Introduction
Microsoft Word is one of the most widely used word processing programs available today. It provides users with a powerful set of tools to create and edit documents of all kinds. However, sometimes users may encounter issues with unnecessary page breaks in their documents. This blog post will explain why these breaks occur and how to remove them.
Explanation of unnecessary breaks in Microsoft Word
Word automatically adds page breaks when text flows from one page to the next. However, users may also manually insert page breaks to control the layout of their documents. In some cases, these manual page breaks can cause issues, such as creating unnecessary blank pages or splitting up content that should stay together.
Fortunately, removing these unnecessary breaks is a straightforward process. Users can follow the steps outlined below to remove manual page breaks:
1. Go to the Home tab and select the Show/Hide button. This will display all page breaks within the document.
2. Double-click on the page break that you want to remove to select it.
3. Press the Delete key to remove the page break.
It’s important to note that this process only removes manual page breaks that users have added to their documents. Automatic page breaks will still appear as needed. Users can’t completely remove automatic page breaks, but they can adjust the settings to prevent them from causing issues.
Adjusting automatic page breaks in Microsoft Word
Users can adjust automatic page break settings to prevent them from appearing in awkward places, such as between lines of text that should stay together. To adjust these settings, users can follow these steps:
1. Select the paragraphs where you want to apply the new page break settings.
2. Go to the Page Layout tab and select the Page Setup dialog box launcher.
3. In the Page Setup dialog box, select the Paragraph option.
4. Under Pagination, select the Widow/Orphan control check box.
5. Click OK to save and apply the new settings.
These settings will help ensure that automatic page breaks appear in more appropriate locations within the document, reducing the need for additional manual adjustments.
Therefore, unnecessary page breaks can cause layout issues and be frustrating for users trying to create a professional-looking document. However, with the steps outlined in this blog post, users can easily remove and adjust page breaks to control the layout of their documents. By using these tools, Microsoft Word becomes an even more powerful resource for creating and editing documents of all kinds.
Step-by-Step Guide to Remove Unnecessary Breaks
Step 1: Show formatting marks
The first step in removing unnecessary breaks is to identify their location. This can be done by showing formatting marks in the document. To do this, go to the Home tab in the ribbon and click on the paragraph icon. This will show all the formatting marks in the document, including page breaks, section breaks, and line breaks.
Step 2: Identify the type of break
Once you have enabled the display of formatting marks, the next step is to identify the type of break you want to remove. There are three types of breaks in Microsoft Word: page breaks, section breaks, and line breaks. Page breaks separate content onto different pages, section breaks split a document into different sections with different formatting, and line breaks split text within a paragraph onto different lines.
Step 3: Use delete key to remove breaks
To remove an unnecessary break, simply place the cursor just before the break you want to remove and press the Delete key. This works for manual page breaks and line breaks. Automatic page breaks cannot be removed but can be adjusted by changing the settings of the document.
Section breaks can be removed by selecting the break and pressing the Delete key. However, if you have multiple section breaks in a document, it may be difficult to identify which one to remove. In this case, it is best to show section breaks in the document and then select and delete them.
Therefore, removing unnecessary breaks in Microsoft Word is easy and straightforward. By following the steps outlined in this guide, users can clean up their documents and improve their formatting.
How to Remove Page Breaks in Word With Delete
Removing unnecessary page breaks in Word can allow for a cleaner and more organized document. By eliminating breaks that disrupt the flow of the text, users can improve the readability of their work. Here is a step-by-step guide on how to remove page breaks in Word using the Delete key.
Identifying the Page Break and Removing It
To remove a page break in Word, the first step is to identify where it is located in the document. This can be done by going to the Home tab in the Paragraph group and clicking on the Show/Hide icon. This will display all of the formatting marks in the document, including page breaks.
Once the page breaks are visible, the user should double-click on the break they wish to remove to select it. After the break is selected, the user can simply press the Delete key. This will remove the unnecessary page break and shift all of the text after it up to the previous page.
It is important to note that not all page breaks are removable. Automatic page breaks are added by the program and cannot be deleted. However, users can adjust the settings of the document to control where automatic page breaks are inserted.
Removing page breaks in Word is a simple process that can improve the overall appearance and readability of the document. By following these steps, users can easily identify and delete unnecessary page breaks in their work.
Removing Line Breaks and Carriage Returns in Word
Microsoft Word is a popular word-processing software that provides various formatting tools. Formatting a document in Word can be challenging, especially if there are unwanted line breaks and carriage returns. However, by following a few simple steps, these breaks can be easily removed.
Identifying Line Breaks and Removing Them
Line breaks are created when the Enter or Return key is pressed when typing text. Sometimes, there can be multiple line breaks between two paragraphs or sentences, which can interrupt the flow and structure of the document. Here are the steps to remove line breaks:
1. Show the formatting marks by clicking on the paragraph icon in the Home tab.
2. Identify the line breaks by looking for the symbol “↵” on the left of the page.
3. Place the cursor just before the line break you want to remove and press the Delete key.
4. Repeat the process for all unnecessary line breaks.
Note that this process works for manual line breaks. For automatic line breaks, the settings of the document have to be adjusted.
Identifying Carriage Returns and Removing Them
Carriage returns, also known as paragraph marks, split a document into separate paragraphs by creating space between them. Here are the steps to remove carriage returns:
1. Show the formatting marks by clicking on the paragraph icon in the Home tab.
2. Identify the carriage returns by looking for the symbol “¶” on the left of the page.
3. Place the cursor just before the carriage return you want to remove and press the Delete key.
4. Repeat the process for all unnecessary carriage returns.
Note that removing a carriage return merges two paragraphs into one, so ensure that the merging of paragraphs works well with the context of the document.
Therefore, identifying and removing unnecessary line breaks and carriage returns in Word can help improve the document’s readability and structure. By following the steps outlined in this guide, users can quickly clean up their documents and enhance their formatting.
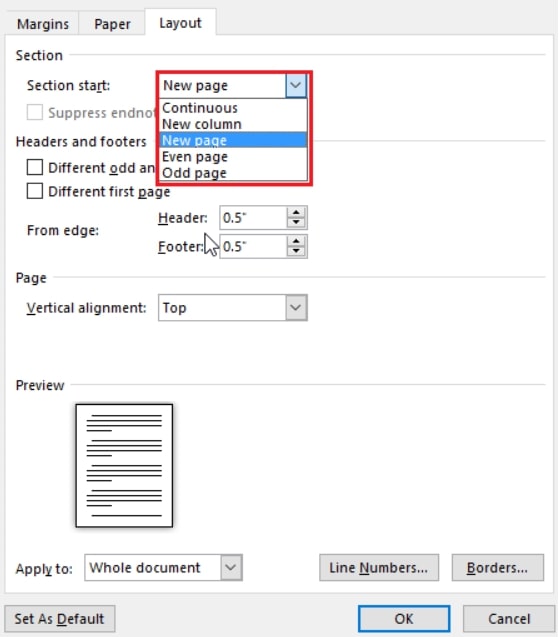
How to Delete Section Breaks in Word
Microsoft Word is an essential tool for creating and formatting documents, but it can be frustrating when there are unwanted section breaks in a document. Section breaks are used to create different sections in a document, such as landscape pages, a table of contents or a new header and footer. Removing section breaks is a simple process, and this guide outlines the steps for identifying and removing them.
Identifying Section Breaks
The easiest way to see where section breaks are is to show formatting marks. To show formatting marks, go to the Home tab and click on the paragraph icon. Once the formatting marks are visible, section breaks look like this:

There are different types of section breaks, and the one shown above is a Continuous section break. Other types of section breaks include Next Page, Even Page, and Odd Page. Once you have identified the section break, you can proceed to remove it.
Removing Section Breaks
To remove a section break, place your cursor just before the section break, and press the delete key. However, it is important to note that deleting a section break merges the text before and after the break into one section. Thus, if you have content in separate sections that you want to keep separate, you should not delete the section breaks.
If you have added section breaks to your document, Word for the web does not support section breaks removal. However, Word for desktop can be used to remove the section breaks. Simply select the section break you want to delete, and then press delete.
So, identifying and removing unnecessary section breaks in Microsoft Word is an important skill for anyone who wants to format documents effectively. The process is simple, and this guide outlines the steps to identify and remove section breaks. Remember to be cautious when deleting section breaks since it merges the text before and after the break into one section.
Remove All Unnecessary Breaks with Find and Replace
In Microsoft Word, finding and removing all unnecessary breaks in a document can be time-consuming and tedious. Fortunately, there’s a quicker and more efficient way to remove them using the Find and Replace tool.
Opening Find and Replace Dialog Box
To access the Find and Replace tool, go to the Home tab and select Replace in the Editing group. Alternatively, press Ctrl+H to open the dialog box quickly. For Mac users, use the Search box located in the upper-right corner of the document.
In the Find and Replace dialog box, enter “^p^p” in the Find what field. The “^p” represents the paragraph mark, and the “^p^p” combination represents two paragraph marks in a row, indicating a line or carriage return in the document.
Using Wildcards to Remove Unnecessary Breaks
To remove breaks using Find and Replace, simply enter “^p^p” in the Find what field and “^p” in the Replace with field. This removes the unnecessary line breaks in the document, leaving only one line break between paragraphs. The result is a cleaner, more organized, and easier-to-read document.
Furthermore, using wildcards allows for even more flexibility when removing breaks. For example, to remove all instances of two or more line breaks and replace them with just one, use the following command in the Find and Replace tool:
Find what: ^p{2,}
Replace with: ^p
This command finds two or more paragraph marks in a row and replaces them with just one, effectively removing all unnecessary line breaks in the document.
Therefore, using the Find and Replace tool in Microsoft Word can save a significant amount of time and effort when removing unnecessary breaks in a document. Users can easily clean up their documents and enhance their formatting by following the steps outlined above.
How to Remove Column Breaks in Word
When creating a document in Microsoft Word, you may come across the need to remove column breaks. Column breaks are beneficial for creating sections within a document, but they can also cause formatting issues. Removing column breaks can be done quickly and efficiently using a few simple steps.
Identifying and Removing Column Breaks
To identify column breaks in your Word document, select the Home tab and click the Show/Hide button in the Paragraph group. This displays all the formatting marks in your document, including column breaks. Column breaks are represented by a dotted line between columns.
To remove column breaks, double-click on the column break to select it. Press the Delete key on your keyboard, or right-click the break and select Delete from the context menu. Repeat this process for every column break you want to remove.
Alternatively, you can remove all column breaks in your document by using the Find and Replace tool. Go to the Home tab and select Replace in the Editing group. In the Find what field, enter “^n”. “^n” represents a column break. Leave the Replace with field empty, and click Replace All. This removes all column breaks in your document.
It’s important to note that removing column breaks can affect the formatting of your document, especially if you have multiple columns. It’s always a good idea to preview your document after removing column breaks to ensure that it appears correct.
Therefore, removing column breaks in Microsoft Word is a straightforward process that can be done in a few simple steps. Whether you want to remove individual breaks or all breaks in your document, the methods outlined above will help you achieve a clean and well-formatted document.
Shortcut to Remove Unnecessary Breaks
Microsoft Word is a popular word processing software used in many fields. When editing a large document, it is common to encounter unnecessary line breaks. Removing these breaks manually can be time-consuming, especially for lengthy documents, and may lead to formatting issues. Fortunately, users can easily and quickly remove unnecessary breaks using keyboard shortcuts and the Find and Replace tool.
Using Keyboard Shortcuts to Remove Unnecessary Breaks
In addition to using the Find and Replace tool, users can remove unnecessary breaks using keyboard shortcuts. To remove extra breaks between paragraphs, simply place the cursor at the end of the first paragraph and press the Delete key. This will remove the line break and merge the two paragraphs into one. Users can also use the Backspace key to remove breaks at the beginning of paragraphs.
To remove all unnecessary breaks in a document using keyboard shortcuts, follow these steps:
1. Press Ctrl+A to select the entire document.
2. Press Ctrl+H to open the Find and Replace dialog box.
3. In the Find what field, enter “^p^p”.
4. Leave the Replace with field blank.
5. Press Alt+A to replace all instances of two or more line breaks with just one.
This shortcut removes all unnecessary breaks in the document, leaving one line break between paragraphs. This is especially useful when working with long and complex documents.
Conclusion
Removing unnecessary breaks in a document may seem like a small task, but it can significantly enhance the document’s formatting and readability. Using keyboard shortcuts and the Find and Replace tool, users can quickly and efficiently remove these breaks without compromising the document’s structure. Word processing software like Microsoft Word has many features that can help users create professional-looking documents quickly. Therefore, it is important to learn these features to optimize productivity and create high-quality documents.
Conclusion
Overall, removing unnecessary breaks in a document can greatly benefit its formatting and readability. Microsoft Word offers various tools to facilitate this process, including keyboard shortcuts and the Find and Replace tool. By using these features, users can quickly and efficiently remove line breaks and section breaks without compromising the document’s structure.
Benefits of Removing Unnecessary Breaks in Document Formatting
Removing unnecessary breaks in a document can optimize its presentation and ease of navigation. When reading a document, it is easier on the eyes to have consistent spaces between paragraphs, rather than inconsistent line breaks. Additionally, removing section breaks can ensure that the document flows smoothly and that page breaks occur in logical places.
By optimizing document formatting, users can create professional-looking documents more efficiently. When document formatting is optimized, it is easier to read and understand the content, leading to better overall communication. When working with long and complex documents, removing unnecessary breaks can also save users time and effort when editing and revising.
Therefore, removing unnecessary breaks in a document is an important step in optimizing its formatting and readability. Microsoft Word provides users with various features and tools to accomplish this, and it is important for users to utilize these features to create high-quality documents.


