
Home Hi-Tech Hardware and Peripherals ,,,,,The manufacturers of medium / high-end modem / router offer increasingly interesting and complete devices and this TP-Link AC1600 Gigabit VDSL / ADSL Wireless Modem / Router is no exception that we have had the opportunity to try for some time.
Among the peculiarities of this product: compatibility with DSL, Fiber and Ethernet Modem connections, 300Mbps (2.4GHz) and 1300Mbps (5GHz) Wi-Fi connections, ideal for online gaming and HD video streaming, Beamforming technology that promises to improve wireless coverage and performance on the 5GHz band and the possibility of control that allows you to manage the preferences of the router easily through iOS and Android devices.
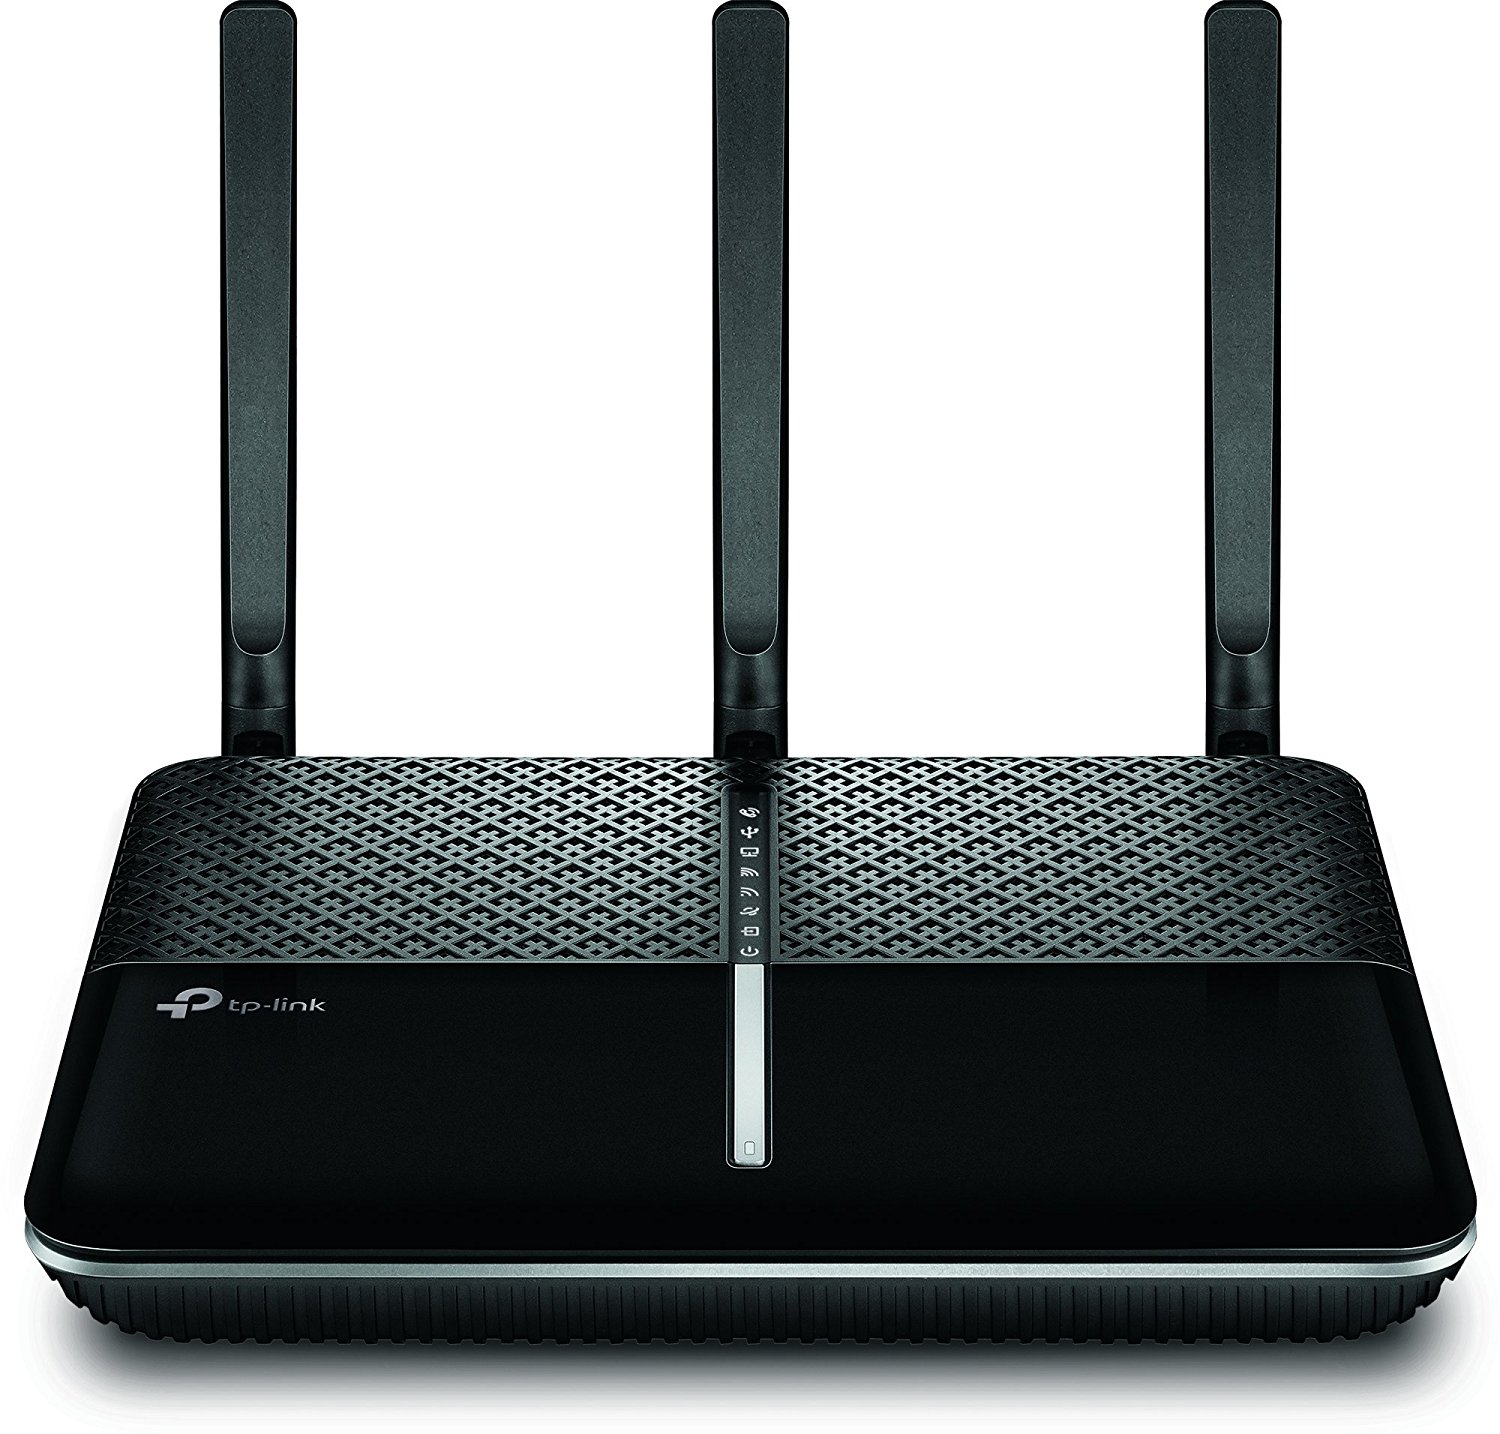
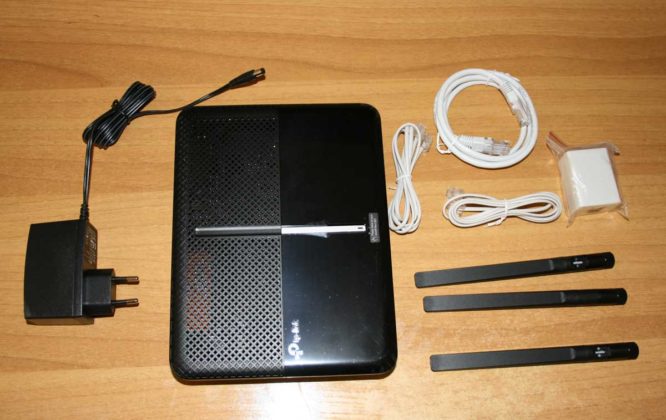
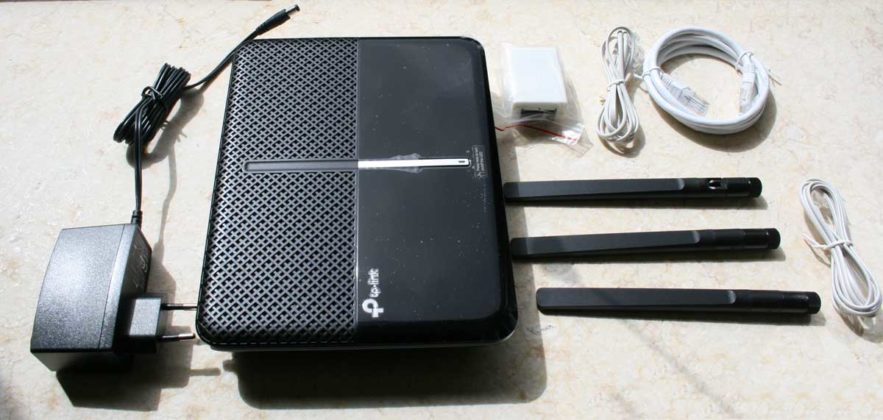
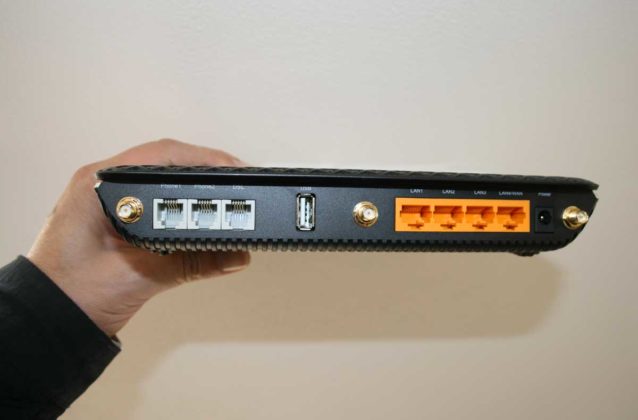
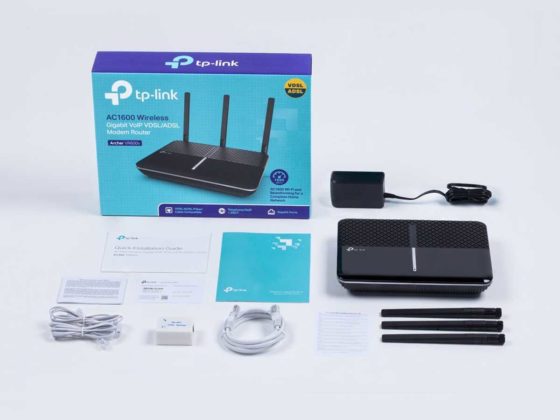
Package contents Inside the package, we find: the actual modem / router, three removable antennas, the power supply (12V, 2A), a VDSL splitter, two telephone cables, the installation guide and a card with SSDID and default password. The router is a 216 x 164 x 36.8mm box; on the back we find the connectors that allow you to screw the three antennas, three Gigabit LAN ports, a LAN / WAN port, a USB 2.0 port (we will see later what it is used for), three RJ45 connectors (the first two dedicated to two telephone lines the last one to the DSL). On the top we find the Power, DSL, Internet, WiFi 2.4GHz and Wi-Fi 5GHz, LAn, USB and WPS LEDs. On the side of the router we find the power buttons, Wi-Fi, WP (to associate new wireless devices that support this standard), LED button (to enable / disable the LEDs) and the reset button.
1 of 6 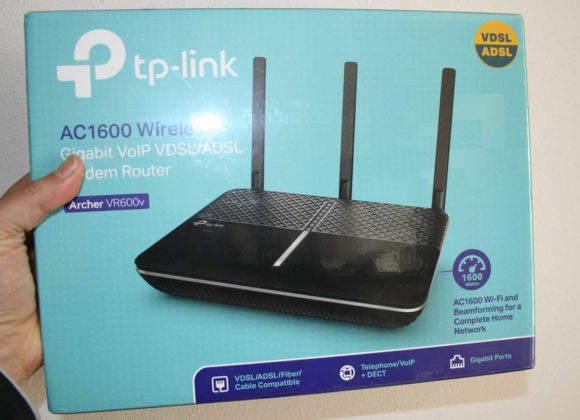

Hardware connection To connect and activate the modem / router, it is necessary to install it according to the type of connection in your home (ADSL, fiber, FTTH fiber, wireless / satellite / ethernet) but in all cases it is simple and well explained in the included guide. If you do not need telephone service, just connect the modem router directly to the telephone socket using a telephone cable, switch on the modem, wait 2 minutes until the Power and DSL LEDs become steady and go to configuration.
With the traditional telephone service (telephones connected directly to the system), Archer must be connected to the telephone system via a splitter. Each additional telephone must be connected to the telephone system via an ADSL filter and can be configured via the Tether app. With VoIP telephone service (telephones connected to the modem provided by the provider) it is necessary to complete the configuration via the web and connect the LAN / WAN port of Archer to a LAN port of the modem provided by the provider. The Tether app helps the user to set up the configuration with fiber (VDSL / FTTS) with or without / telephone service and also with other wireless or satellite connections.

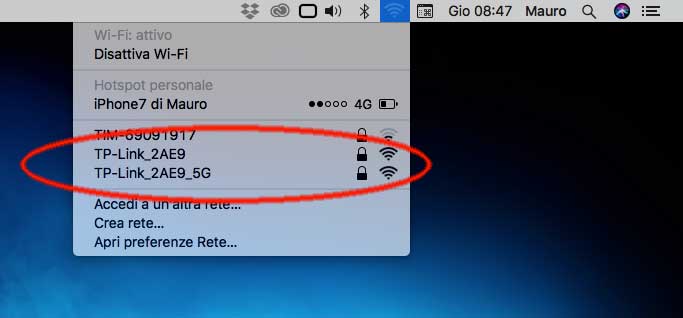
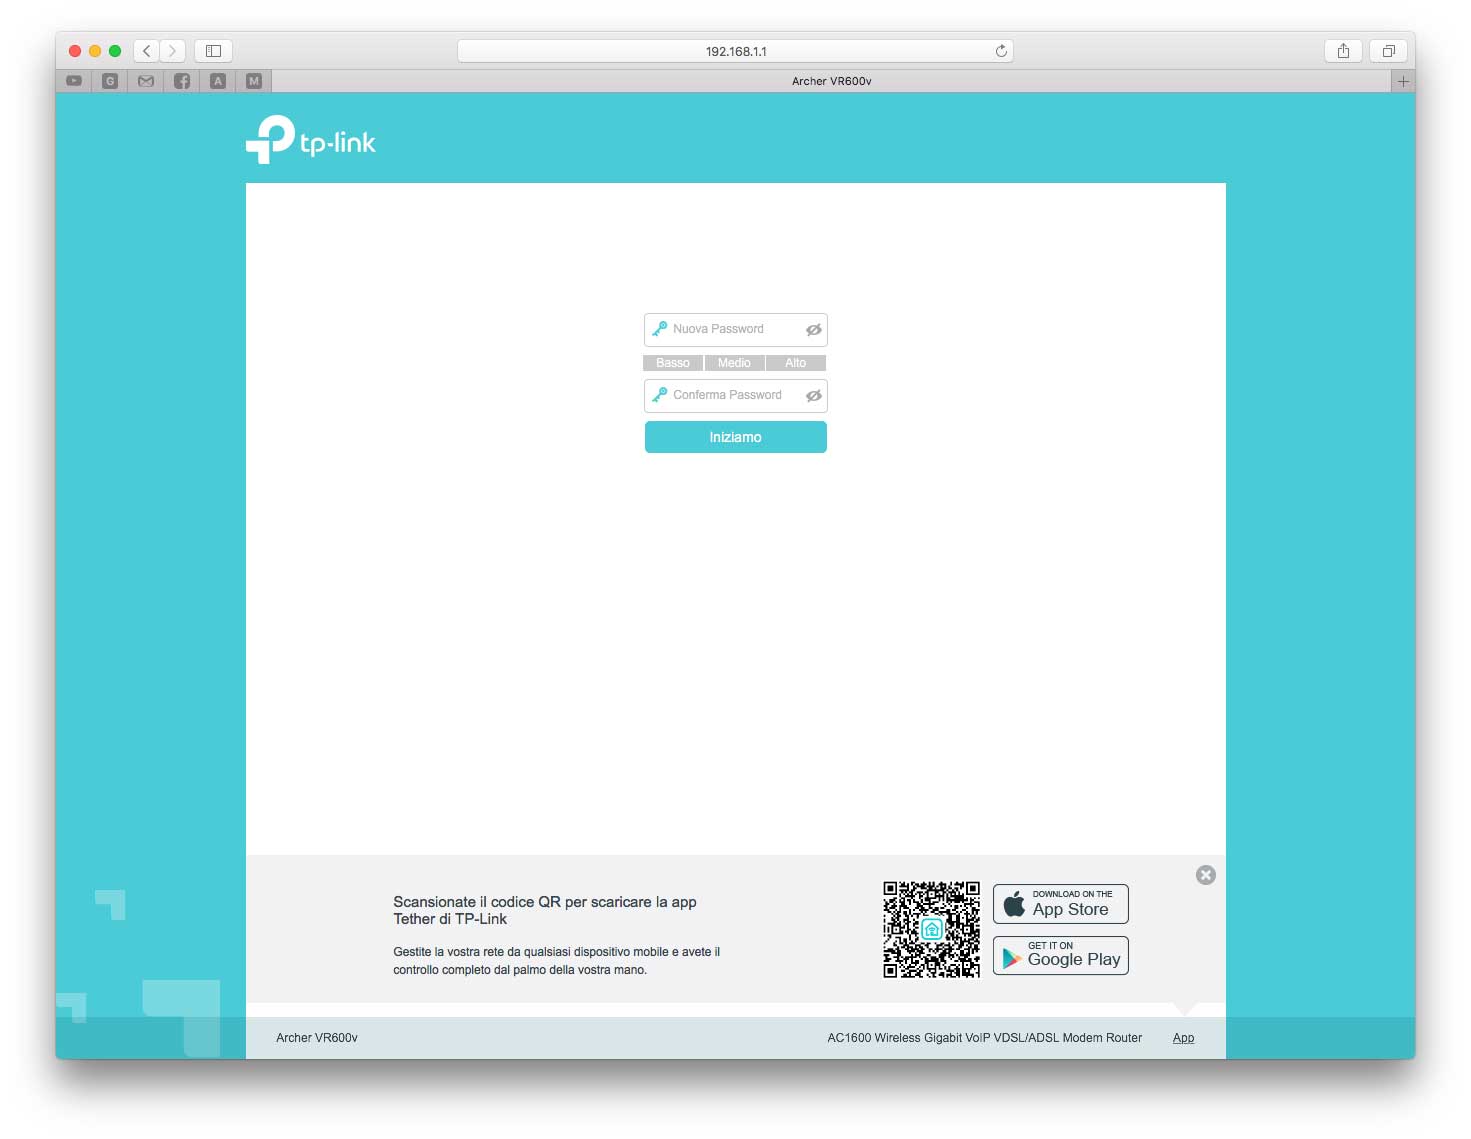
Configuration via web We have carried out the tests with an ADSL with traditional telephone service. We screwed the three antennas on the back, connected the power supply, the cable from the telephone socket to the ADSL splitter and the telephone cable from the splitter to the modem / router. The configuration can be done in various ways. We opted for the wireless configuration: we selected the “TP-LINK_2AE9_5G” network from the list of visible networks and indicated the password found in the leaflet included in the package. At this point it is possible to connect to the administration interface by going from a browser at the address http://192.168.1.1.
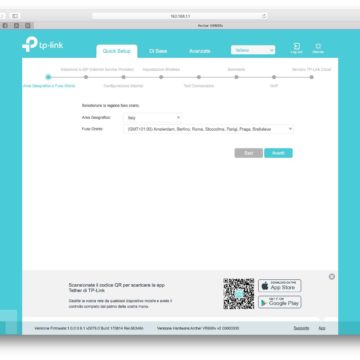
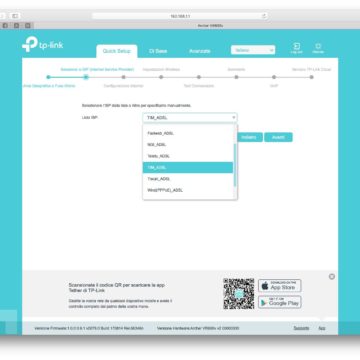
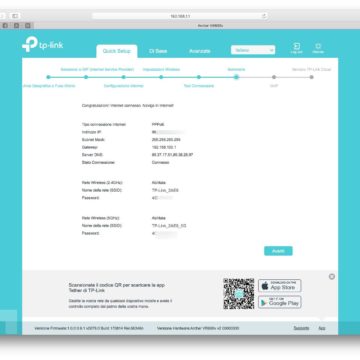
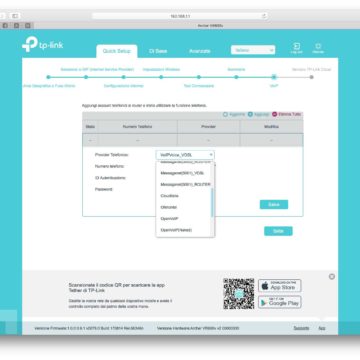
The first operation required is to change the default password. After specifying the password, you choose “let's get started”. Now you have to choose the geographic area and the time zone. At this point a list of providers (ISP) linked to the chosen country is presented but it is always possible to choose “other” and manually specify some settings. You can enter the information relating to the Internet connection (type of connection, username and password) and finally specify whether or not to activate the two wireless networks (2.4GHz and 5GHz), specify the network names (SSID) and their passwords. By clicking on “Next” the settings are saved and the router set with our instructions. You can now add phone accounts to the router and start using the telephony function by specifying the phone provider., Phone number, ID and password. You can also press “Skip” and configure these settings later. The network is now successfully set up and you can surf the internet.
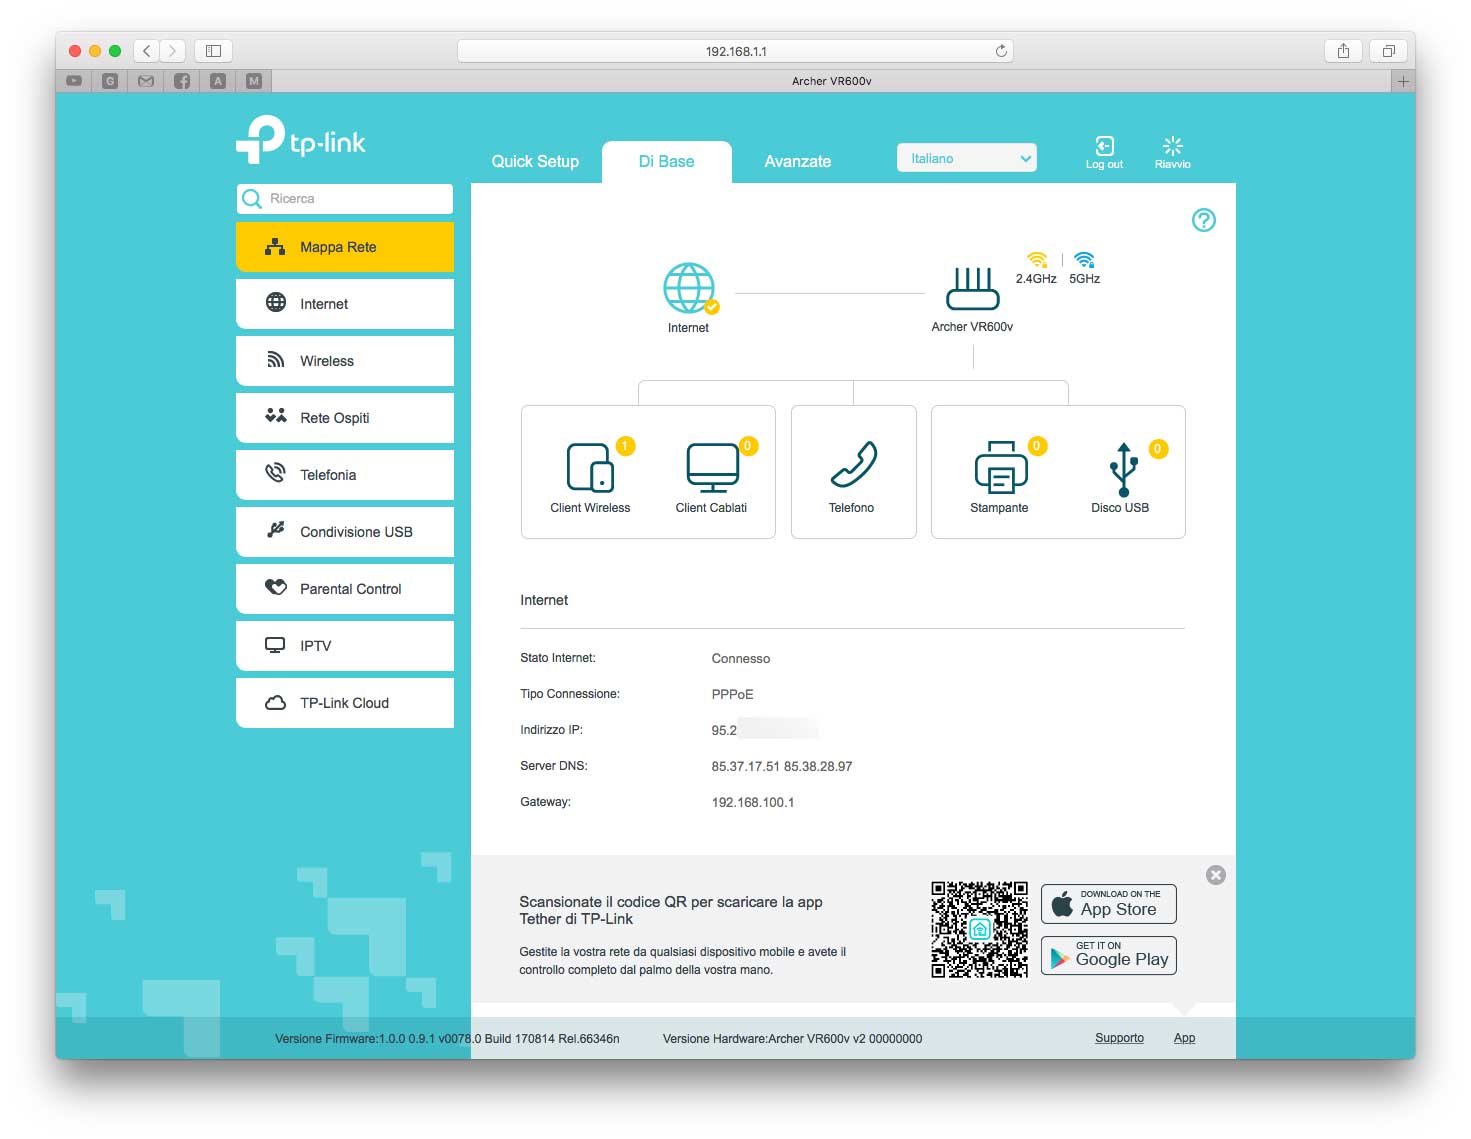
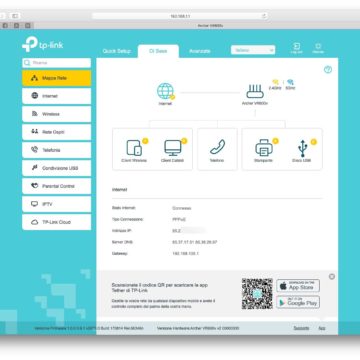
The administration interface The modem / router administration interface is very complete. This (which can be called up from any browser) is divided into three areas: Quick Setup (to start the initial settings), “Basic” and “Advanced”. From the “Basic” section it is possible to obtain a network map, change settings related to the internet connection, change wireless settings, activate a guest network, call up functions related to telephony management, activate USB sharing (sharing storage units connected to the USB port of the router) or printer server functionality (printers connected to the USB port of the router), activate parental controls by restricting or not content based on keywords, blacklists and whitelists, activate IPTV functionality and connect to TP-Link Cloud accounts. This function allows you to access local devices and servers (FTP, HTTP, etc.) via the Internet wherever we are, always keep the firmware updated with the Online Update function, manage multiple devices with a single account.
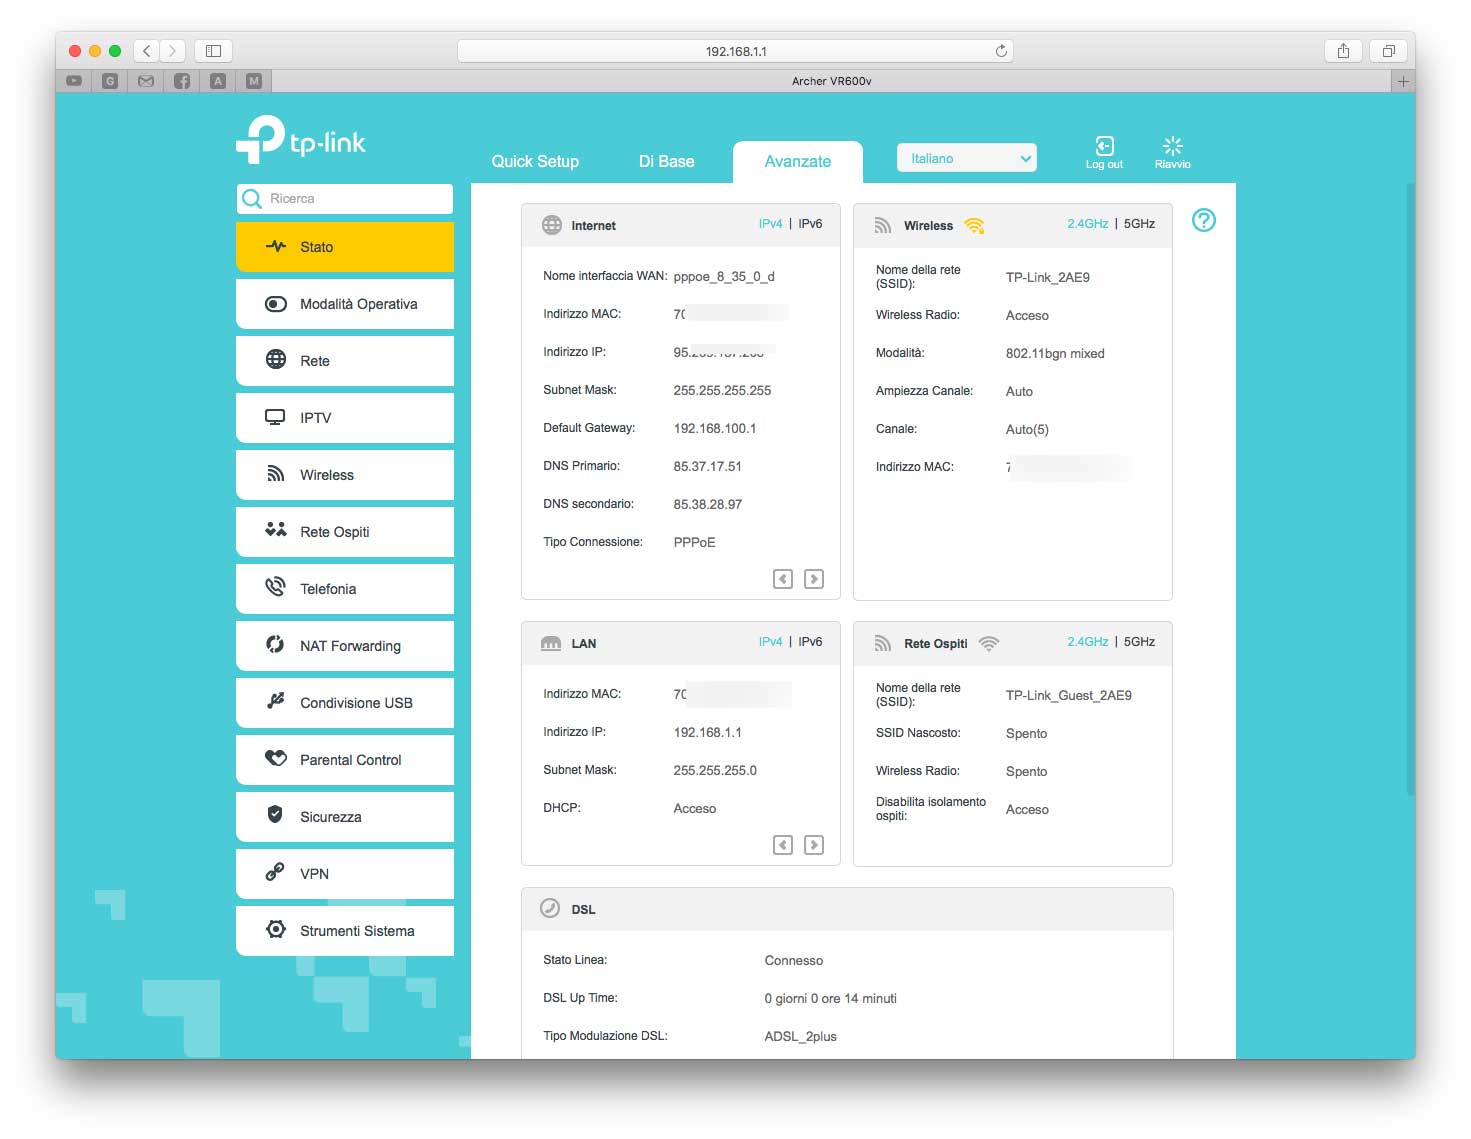
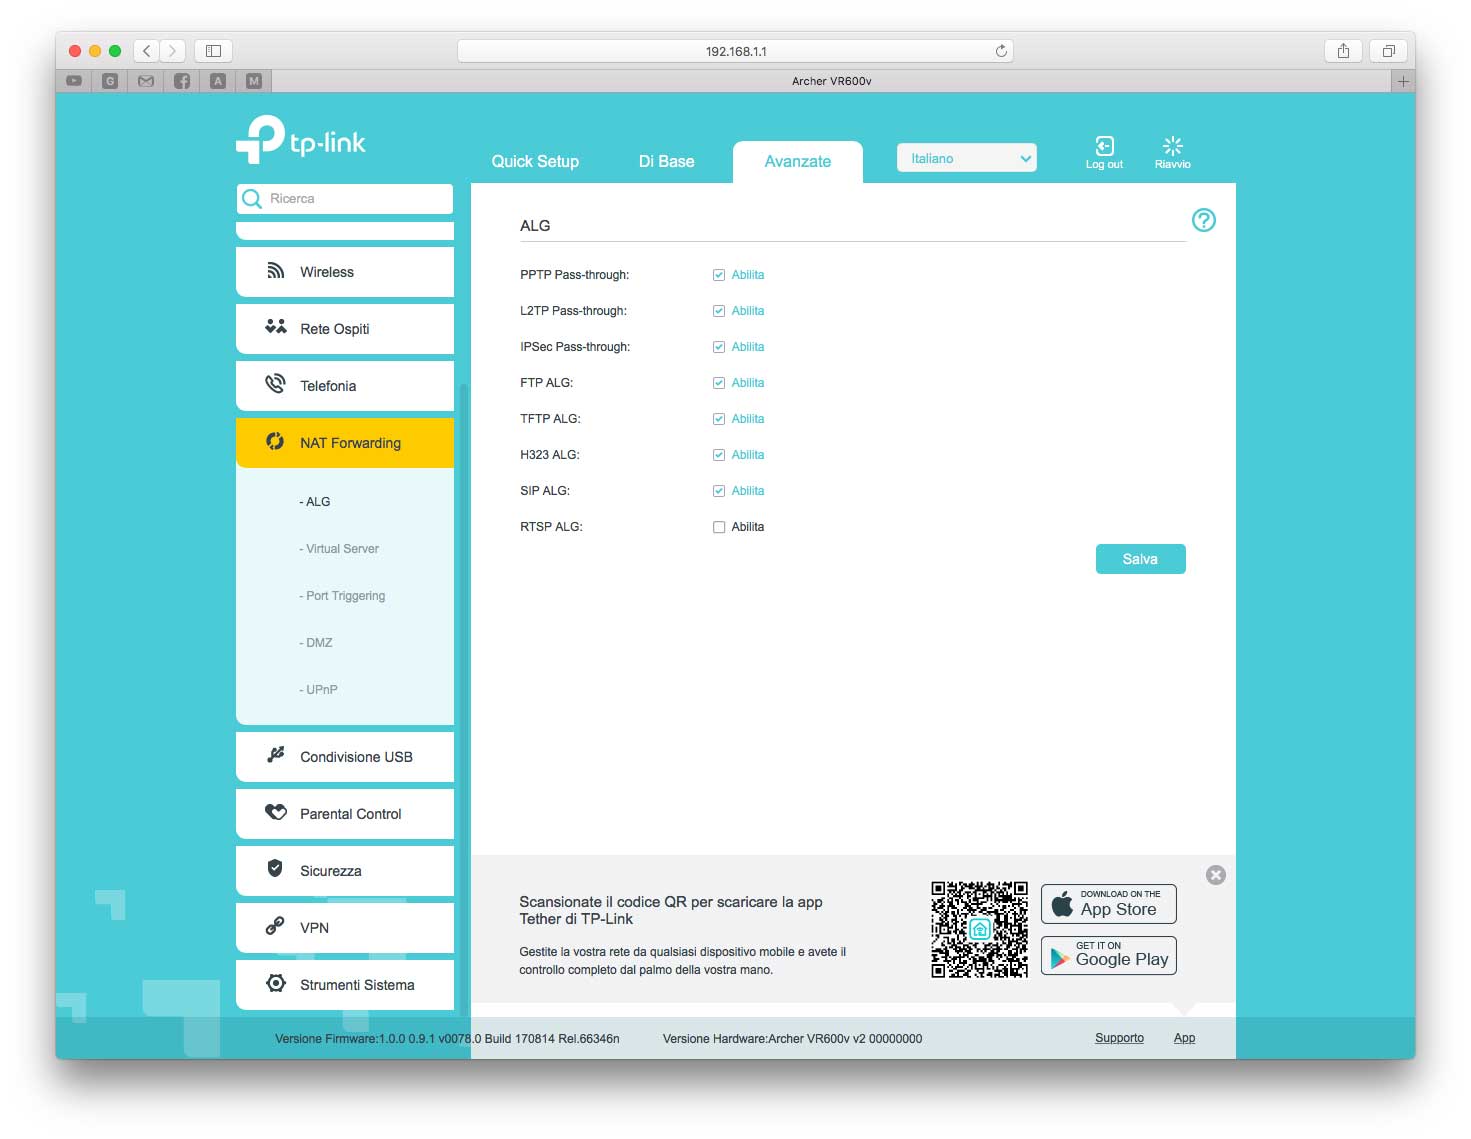
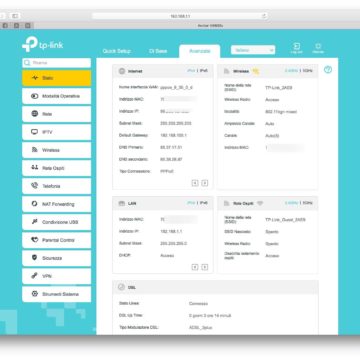
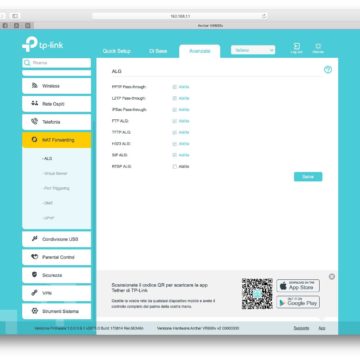
The “Advanced” section is dedicated to experts. From here it is possible to quickly check the status, modify the router operating mode according to the network operating conditions, modify parameters related to internet connections (DSL modulation, VPI, VCI, VLAN ID, etc.), add groups of interfaces, modify advanced DSL settings, set up dynamic DNS services (useful for hosting a website, an FTP server or another server, behind the router), set up static routing, reconfigure the IPv6 Tunnel settings. There is no lack of NAT forwarding functions, virtual server management (to allow the forwarding of connections from the Internet on certain service ports to the LAN device for which they are intended), ALG support (necessary for the use of applications with data connections and control multiple behind NAT, Demilitarized Zone (DMZ) host function that allows a local host to be exposed to the internet for a specific service, such as internet gaming or video conferencing, UPnP functionality (to allow devices such as computers and appliances on the internet to detect each other and communicate automatically on the local network.
USB Sharing The “USB Sharing” section in “Advanced” allows you to share USB storage devices between different clients in the LAN or over the internet. To set up a file server just connect the USB storage device directly to the USB port; you can share content by creating an account with name and password specifying which access methods to enable (FTP, media server, http, etc.). The Printer Server function allows, as mentioned, to share a USB printer on the network. Install the printer driver on the computer, connect the printer to the USB port of the router via a cable, install the TP-Link USB Printer Controller utility on the computer.
Advanced sections The “3G / 4G Settings” section allows you to enable 3G / 4G as a backup solution for Internet access by specifying modem, PIN, mobile ISP and the various parameters for backup authentication. There is obviously no lack of advanced security features. The SPI (Stateful Packet Inspection) Firewall (feature is enabled by default) prevents cyber attacks and validates the traffic passing through the router based on the protocol. Denial of Service (DoS) Protection protects the LAN from DoS attacks to prevent flooding the network with server requests. Three types of attacks can be filtered as needed with four levels for each filtering. The “Service Filtering” option prevents specific users from accessing the specified service or completely blocks internet access. In the “Access control” section it is possible to block specific devices, preventing them from connecting to the local network or to the Internet. You can allow access to all devices except those listed (by selecting Blacklist) or allow access to only the devices listed (by choosing Whitelist). To add devices in the Blacklist / Whitelist section just click Add, specify the device name or MAC address and click Save.
The IP & MAC Binding section (also known as ARP Binding) is useful for governing specific LAN devices by permanently linking their IP address and MAC address. This system also prevents the use of connected IPs by other devices.
The “OpenVPN” section allows you to use the internet for secure access to the network when we are not at home. To use the service, you need to configure the Dynamic DNS Service or assign a static IP address for the router's WAN port. OpenVPN, PPTP VPN and IPSec VPN options can be enabled.
System settings From the “System tools” section it is possible to specify the night mode for the LEDs (specifying the start time). When this is enabled, the LEDs remain off for the specified period, without affecting the performance of the router. The “Push service” allows you to configure the e and inform the user about the latest events of interest, for example phone calls or lost voice messages. A Diagnostics section helps you do troubleshooting tests for network connectivity issues. There is no lack of functions to update the firmware, back up / restore settings, restart the modem, manage the password and access permissions of the clients connected to the router, recall the system activity log, change settings related to the CWMP protocol (CPE WAN Management Protocol, also known as TR-069) which allows the Auto-Configuration Server (ACS) to perform self-configuration, provisioning, connection and diagnostics. Also interesting is the “Traffic monitor” function to monitor data usage through the router.
Beamforming technology Beamforming technology improves wireless coverage and performance on the 5GHz band. Simplifying: traditional WiFi routers transmit the signal indiscriminately at the same intensity in all directions, those that take advantage of this technology are able to estimate the position of the connected device and direct the signal in the optimal direction. Archer VR600 supports beamforming only on the 5GHz band but the difference with the other band is evident. In a three-story house with thick walls we were able to get a good signal level on all three floors by installing the router on the middle floor. In general, compared to the modem supplied by the operator on the 5 GHz frequency, the VR600v was generally more performing with all the devices we tried to combine it with (Mac, PC, TV, iPad, iPhone). The speedtest results showed excellent results with maximum bandwidth always exploited to the fullest with the 5GHz Wi-Fi connection.
Conclusions It is a complete product, able to offer everything you could wish for: GigaBit Ethernet connections, USB port for connecting storage units and above all a very complete software to create with ease network guests, manage the Internet access modes for each device, protect the network from potential threats. You can manage your network settings from any Android or iOS device, including Parental Control and media sharing. The Tether app allows you to manage accesses in real time (real identify who is connected to the network and manage users), warn in case of firmware updates, create “white list”, etc.
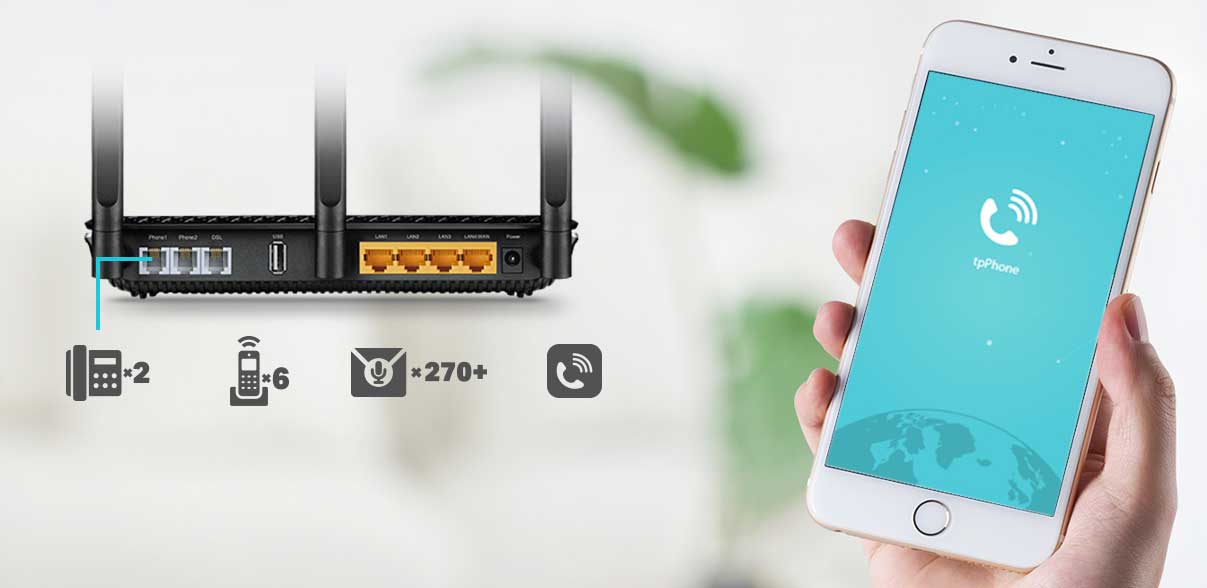
The telephone module supports up to 6 cordless telephones and 2 traditional telephones or fax machines; it also integrates an answering machine with 270 minutes of memory. Using the tpPhone app, you can use your smartphone as if it were a cordless phone via the wireless connection to the router. From the smartphone it is possible to access the contacts agenda, the list of missed calls and voice messages, keeping the home phone under control even when we are away. Archer VR600v has a list price of 149.00 euros. On Amazon it is possible to find it for 139.90 euros.


,,


