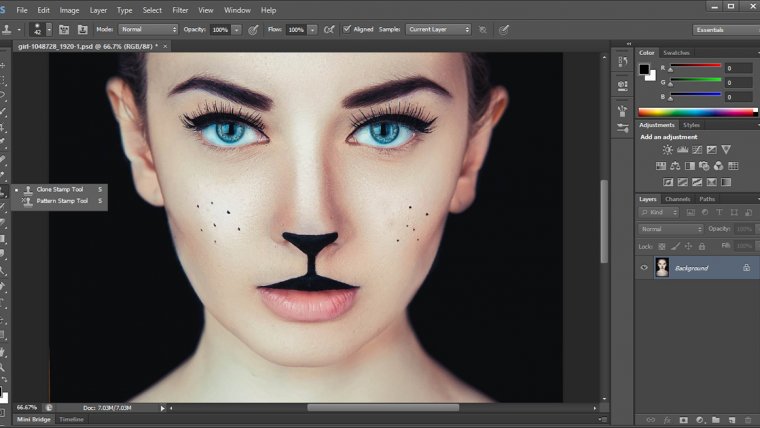
how to correctly use the clone stamp in adobe photoshop
The Clone Stamp tool is one of the essential tools in Adobe Photoshop. It duplicates a part of an image and covers any unwanted elements or blemishes. Photographers, designers, and digital artists widely use it to accomplish various editing tasks on photos and other digital media. In this blog, we will discuss in detail everything you need to know about the Clone Stamp tool.
What is the Clone Stamp tool?
The Clone Stamp tool is a painting tool in Photoshop that allows users to duplicate a selected area of an image and replicates it onto another part. It is represented by a rubber stamp icon in the toolbar. Photographers and digital artists use this tool to fix image imperfections such as removing unwanted subjects, blemishes on skin, and even trees or objects on landscapes.
Why is it useful in Adobe Photoshop?
The Clone Stamp tool is a much-needed tool for any graphic designer or digital artist. Its usefulness comes from its accuracy and attention to detail, and it is used to achieve flawless image editing. Using it, you can eliminate any unwanted subjects, blemishes, and other imperfections while maintaining the consistency of the picture. Using this tool, digital artists and designers can explore their creative skills by duplicating and manipulating pixels.
When using the Clone Stamp tool, users must adjust the brush size and opacity to create the perfect match. It is also essential to mix the clone sources and opacity settings to make the best result. The tool options bar at the top of the workspace has all the options to adjust the brush size, flow, blending modes and shape opacity.
Therefore, the Clone Stamp tool is an important tool in Adobe Photoshop that helps digital artists, designers, and photographers to edit images seamlessly. Knowing how to use the Clone Stamp tool is essential for anyone looking to create perfect images. With the right brush size, opacity, and sources, it is possible to achieve the desired result.
Getting started with the Clone Stamp Tool
If you are new to Photoshop or looking to learn more about one of its most popular tools, the Clone Stamp Tool, then you’ve come to the right place. This tool is used to duplicate specific areas of an image, making it an ideal tool for retouching or removing unwanted elements. Here’s a step-by-step guide on how to use the Clone Stamp Tool in Photoshop.
Step 1: Select the Clone Stamp Tool from the Tools panel.
The Clone Stamp Tool can be found in the toolbar on the left-hand side of the Photoshop interface. The shortcut key for the tool is “S” for both Mac OS and Windows. If you can’t see the toolbar, make it visible by selecting the “Window” menu and clicking on “Tools” at the bottom.
Step 2: Select a Clone Source.
Once you have selected the Clone Stamp Tool, you need to select the area of your image that you want to duplicate, also known as the “Clone Source”. To do this, hold down the “Option” key (Mac OS) or “Alt” key (Windows) and click on the area of the image you want to clone. A target icon will appear to indicate your selected Clone Source.
Step 3: Start Cloning Your Image.
Now that you have your Clone Source selected, position your cursor over the part of the image you want to clone and click and drag to clone the pixels. You can adjust the size of the Clone Stamp Tool brush by using the bracket keys [ ] on your keyboard. A smaller brush will give you more precise control, while a larger brush will allow you to cover larger areas more quickly.
Step 4: Blend and Fine-Tune the Cloned Image.
When you clone an area of your image, it may not perfectly match the surrounding pixels. You will need to blend and fine-tune the cloned image to make it look seamless. One way to blend is to change the blending mode of the Clone Stamp Tool in the options bar at the top of the interface. Experiment with these modes and adjust the opacity and flow settings to suit your desired effect.
Step 5: Keep it organized.
It can be easy to get carried away with the Clone Stamp Tool, but it’s important to keep your work organized and non-destructive. Create a new layer for your cloned content so you can adjust and edit it separately from the original image. This will also allow you to easily adjust opacity and masking for more advanced editing.
Step 6: Finishing touches.
Once you’ve cloned your image and blended it seamlessly into the surrounding pixels, you can add any final touches or adjustments to the image. This is where you can experiment with color correction, exposure or other necessary adjustments to make the image look perfect.
Therefore, the Clone Stamp Tool is a powerful and versatile tool in Photoshop that can help you with touchups, removing imperfections, and duplicating content. Follow these simple steps and you’ll be well on your way to using this tool like a pro.
Setting the Sample Point
When using the Clone Stamp Tool in Photoshop, it’s essential to set your sample point carefully. This is the area of your image that you want to duplicate or clone. Here’s how to set your sample point using the Clone Stamp Tool.
Select the Clone Stamp Tool and hold Option (on Mac) or Alt (on Windows) to bring up the crosshairs.
The Clone Stamp Tool is located in the toolbar on the left-hand side of the Photoshop interface. Once selected, hold down the “Option” key on Mac or “Alt” key on Windows to bring up the crosshairs.
Click the area with your cursor that you want to serve as the sample point for your brush when you do your touch-up.
Next, use the cursor to click on the area of the image you want to copy. This sets the sample point for the Clone Stamp Tool brush to use as the source when you paint over another area of the image. It’s essential to choose a sample point that closely matches the area you want to touch up or clone. The Clone Stamp Tool will clone the area of the image from the sample point, so it’s best to choose an area that has a similar texture, color, and lighting.
Once you’ve set your sample point, you’re ready to start cloning or touching up your image using the Clone Stamp Tool. It’s best to work on a duplicate layer, so you can easily undo or adjust your editing. Now that you know how to set your sample point using the Clone Stamp Tool, you can begin using this powerful tool to create stunning images out of less than perfect ones.
Copying an Area using Clone Stamp Tool
Photoshop’s Clone Stamp Tool is widely used for copying one area of an image to another. This tool is a useful option for editing and retouching images, as it allows you to remove any unwanted elements or details from your image. In this article, you will learn how to use the Clone Stamp Tool in Photoshop to copy an area.
Move the cursor to an area to copy
To start copying an area, select and hold the rubber stamp icon in the toolbar on the left-hand side of the interface, and then click on the Clone Stamp Tool. Once you have selected the tool, move the cursor to the area of the image that you want to copy.
Alt+click (Windows) or Option+click (Mac) to select the source area
To select the source area, hold down the “Alt” key (Windows) or “Option” key (Mac) and click on the area of the image that you want to copy. This will select the area as the source and create a target icon to indicate the selected source.
After selecting the source, move the cursor to the area where you want to place the copied image. Click once to apply the copied image.
It is essential to make sure that the source area and the area where you are copying the image match. Therefore, use the Clone Stamp Tool carefully and try to make the duplicated area blend in seamlessly to maintain the image’s overall appearance.
Therefore, the Clone Stamp Tool is an essential option for retouching and editing images in Photoshop. It allows you to duplicate specific areas of an image and is an ideal tool for removing unwanted elements. Use this tool with care and precision, and you will see the difference it makes to your photos.
Painting with the Clone Stamp Tool
After selecting the source area, you can now start painting with the Clone Stamp Tool in Photoshop. This tool is an excellent option for removing blemishes, unwanted objects, and even duplicating parts of an image. In this section, you will learn how to use the Clone Stamp Tool to paint over unwanted areas in your images.
Simply click and drag the clone stamp over the portion of the picture you want to get rid of.
To begin painting with the Clone Stamp Tool, hover over the selected source area and hold down the left-click button on your mouse or trackpad. Then, slowly drag the cursor over the unwanted area you want to replace. In doing this motion, you will be painting your source area over the unwanted object with the Clone Stamp Tool.
It’s important to note that while you’re painting, the clone source will move with your cursor. This movement allows you to paint with a seamless blend as you duplicate the source area onto your image.
In performing this motion, you will be painting your source area.
While using the Clone Stamp Tool, it’s vital to pay close attention to the areas where you paint, making sure that they do not appear repetitive. One way of avoiding this issue is to continually adjust the Clone Stamp Tool’s size to match the object’s size you are trying to replace. Some other helpful tips to keep in mind include:
– Creating a new layer to avoid making permanent alterations to your original image
– Zooming in closely to the portions that you are removing for better accuracy
– Adjusting the brush’s size and hardness as needed for more precise painting
– Avoiding making obvious patterns with your source areas
Therefore, the Clone Stamp Tool is an essential tool for editing photos in Photoshop. It allows you to copy and paste an area of an image onto another area, eliminating any unwanted objects or details. With practice and patience, you can master using the Clone Stamp Tool to create flawless images that are ready for your social media profiles or clients.
Adjusting Brush Size and Hardness
Photoshop provides numerous options to adjust the brush size and hardness according to the user’s requirement. The brush tools are one of the most versatile tools in Photoshop, and the ability to adjust their appearance makes them suitable for various applications. In this section, we will explore how to adjust brush size and hardness in Photoshop.
Increasing/Decreasing Brush Size
Photoshop provides various ways to adjust the brush size. The fastest way is to use the square bracket keys “[” and “]” on the keyboard. Pressing “[” key decreases the brush size, whereas pressing “]” key increases the brush size. Alternatively, users can also adjust the brush size through the options bar located just below the menu bar. Adjust the slider or click on the drop-down menu to set the brush size manually.
Adjusting Brush Hardness
Brush hardness determines the amount of feather or blur at the edges of the brush’s outline. The higher the hardness value, the sharper the brush edge will be. Similarly, lower hardness values result in softer brush edges. To adjust brush hardness, users can either use the hardness slider located in the options bar or use the keyboard shortcut “Shift+Alt+ right-click (Win) or Shift+Option+click (mac).” Drag the mouse left or right to decrease or increase hardness, respectively.
Bristle Tip Shape Options
Photoshop also offers Bristle Tip Shape options that let users specify specific bristle characteristics resulting in highly realistic natural-looking strokes. Users can adjust the following brush tip shape options in the Brush Panel:
– Shape: Determines the overall arrangement of bristles.
– Bristles: Controls overall bristle density.
– Length: Changes bristle length.
– Thickness: Controls the width of individual bristles.
Enter a percentage value or drag the points in the preview box. A value of 100% indicates a circular brush, a value of 0% indicates a linear brush, and intermediate values indicate elliptical brushes. Adjusting roundness to compress a brush tip shape.
Differences between Brush Size and Hardness
Increased brush hardness is recommended for sharp, distinct boundaries, whereas lower hardness values are better for gradual or blended edges. On the other hand, brush size determines the coverage area and can be used to fill large areas quickly or add a small amount of detail to a specific part of an image. Users should experiment with different brush sizes and hardness values to know which settings work best for a particular project.
Therefore, Photoshop’s brush tools are versatile and allow users to adjust the brush size and hardness as per their liking and requirements. Whether you need sharp, distinct boundaries or gradual and blended edges, adjusting brush hardness can help you achieve your desired result. Similarly, larger brush sizes can fill large areas quickly, whereas smaller sizes can add details to specific regions of an image. Play around with different brush settings to know which one works best for you.
Cloning on a new layer
Cloning on a new layer will keep the original image untouched and have a place for future graphic design adjustments.
Cloning on a new layer is a technique commonly used in Photoshop to remove objects, skin imperfections or make other adjustments to an image. This technique creates a duplicate layer of the background layer, allowing users to work on a separate layer without altering the original image. This feature is handy as it ensures that the original photo remains untouched and provides a place to make changes if required.
To clone on a new layer in Photoshop, users should select the image’s background layer and right-click to select “Duplicate Layer.” This way, users can always go back to the original photo if needed. After creating the duplicate layer, users can use the clone stamp tool to remove any object they want and adjust various parameters such as brush size and hardness.
Using the clone stamp tool is relatively easy. Users have to select it in the toolbar on the left and adjust the brush size and hardness accordingly. To remove an object, users should select the clone source by holding the alt key and clicking on the part of the image they want to clone. This way, the clone stamp tool uses that part of the image to clone over the object a user wants to remove.
One of the significant advantages of cloning on a new layer is its usefulness for graphic design applications. Suppose a user wants to create a graphic design using a photo as a base layer. In that case, cloning on a new layer makes it easy to remove any object that might hinder the final composition’s aesthetics.
Removing skin imperfection is another use of the clone stamp that works well with the cloning on a new layer technique. Users can use the clone stamp tool to clone over acne, blemishes, or any other skin imperfections and retain smooth skin. This technique can provide a quick fix to skin imperfections without having to go through a lengthy process of using the healing brush or other tools.
Therefore, cloning on a new layer is a highly effective technique to keep the original image untouched and make necessary changes to it. Use the clone stamp tool appropriately to remove any unwanted object or skin imperfection, and play around with brush settings to achieve the desired result.
Common Issues with Clone Stamp Tool
One of the most commonly used tools in Photoshop is the Clone Stamp Tool. It is perfect for removing unwanted objects, blemishes, or even replacing entire areas of an image. However, like any tool in Photoshop, there are certain issues users can face when using the Clone Stamp Tool. In this section, we will discuss some of the most common issues users face while using the Clone Stamp Tool.
Could not Use Clone Stamp Tool Because the Area to Clone Has Not Been Defined
This issue is relatively easy to resolve. Users may encounter this message when trying to use the Clone Stamp Tool if they have not defined the area to clone. One possible reason for this issue could be that the user is trying to clone from a transparent area on one of their layers. In this case, the Clone Stamp Tool will not work. To avoid this, users should always define the area they want to clone before using the Clone Stamp Tool.
Be Careful with the Source Area’s Edges
When using the Clone Stamp Tool, one needs to be careful with the source area’s edges as they can cause an unnatural look when pasted into the destination area. This happens when the source area’s edges do not match the destination area’s edges, making the pasted area appear out of place. To prevent this, users should use the Clone Stamp Tool carefully and make sure the edges of the source area match the destination area’s edges.
Brush Size and Hardness Issues
Another common issue while using the Clone Stamp Tool is with brush size and hardness. The brush size and hardness determine the size, shape, and intensity of the brush. Using an incorrect brush size or hardness can lead to bad cloning results. Users should experiment with the brush size and hardness to achieve the desired cloning results.
Use an Appropriate Brush
Using an inappropriate brush can lead to poor cloning results. The Clone Stamp Tool works best with a soft, round brush. Other brushes may be too sharp or leave jagged edges, leading to an unnatural look. Users must choose an appropriate brush to achieve the desired cloning results.
Therefore, the Clone Stamp Tool is a powerful tool that can help users remove blemishes, unwanted objects, or even replace entire areas of an image. However, like any tool in Photoshop, it has its limitations and common issues. By understanding these issues and practicing with different settings, users can overcome them and achieve their desired results.
Conclusion
Recap of the Correct Clone Stamp Tool Methodology, Ideal Use Cases, and Additional Tips on How to Master the Tool
Therefore, the Clone Stamp Tool in Photoshop is a powerful tool that can be used to remove blemishes, unwanted objects and replace entire areas of an image. However, in order to achieve the desired results, users need to have a good understanding of the correct methodology, ideal use cases, and additional tips for mastering the tool.
Users should begin by exploring the workspace and locating the Clone Stamp Tool. They should then define the area they want to clone before using the tool, as failure to do so can result in error messages or poor cloning results. Users may also encounter issues with the edges of the source area, making the pasted area appear unnatural. Experimenting with the brush size and hardness can help overcome issues that arise during cloning.
Additionally, users should use an appropriate brush, such as a soft and round brush, to achieve the desired cloning result. They should also try to mix different clone sources and opacity settings while playing around with the brush opacity to achieve the best result.
Ideal use cases for the Clone Stamp Tool include removing skin imperfections, cleaning up a background, or replacing an object from the image without leaving a trace.
Overall, the Clone Stamp Tool may seem daunting, but with practice and experimentation with different settings, users can master the tool and achieve the desired result. However, it is important to remember that the Clone Stamp Tool has its limitations and may not always provide the best solution for every task.
By using the tips and guidelines discussed in this article, users can have a good understanding of the Clone Stamp Tool methodology and achieve impressive cloning results in their images.


