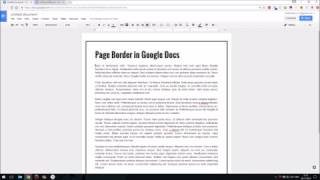
how to create borders on google docs
Google Docs is an effective and user-friendly word processing platform used by millions of people around the world. It offers a range of formatting options, including adding borders to your document or paragraphs. Creating a border in Google Docs can help you organize the content and make it more visually appealing. This article explores the various ways of creating a border in Google Docs and how to edit or adjust it according to your needs.
Introduction to creating borders in Google Docs
Learning how to add a border in Google Docs can help you elevate the presentation of your document. A border is a line that surrounds a paragraph or an entire document in a Google Docs file. By default, Google Docs doesn’t show borders while creating a file, but you can enable them by selecting the border under the formatting options or using tables.
Reasons to use borders in Google Docs
Adding borders to your Google Docs document can make it look more structured and organized. Here are some common reasons why you might want to use a border:
– Highlight information: Borders can help emphasize important sections of your document, such as titles or headings.
– Increase readability: Borders can make your content more readable by separating different sections of your text.
– Create a professional look: A border can give your document a professional and polished look, especially if you are creating a formal document like a resume or a cover letter.
There are two ways to add a border in Google Docs: using a table and selecting the border under the formatting options. Let’s explore these methods in detail.
Using tables to add a border in Google Docs
Tables are a useful tool in Google Docs that can help you structure your document. Additionally, they can also create a border around your entire document. To create a border using tables, follow these simple steps:
1. Open a new document in Google Docs or open an existing document that you want to add a border to.
2. Click on the “Table” option in the toolbar.
3. Select the size of the table you want to create.
4. Once the table is created, select the border option from the formatting toolbar.
5. You can adjust the thickness, color, and style of the border according to your preference.
Selecting the border under formatting options
The second method of adding a border is through the formatting options provided in Google Docs. This method is useful if you want to add borders only to specific paragraphs or text boxes. Here are the steps:
1. Open a new document or an existing document in which you want to add a border.
2. Highlight the text or paragraph in which you want to add the border.
3. Click on “Format” in the top toolbar.
4. Select “Borders and lines” from the dropdown menu.
5. Choose the style, color, and thickness of the border according to your preference.
Conclusion
Therefore, adding a border in Google Docs can help you create a more organized and visually appealing document. There are two ways to add a border: using tables or selecting the border under formatting options. Understanding how to add a border and how to edit or adjust it can help you create a document that meets your specific needs. Give it a try and see how it enhances the presentation of your document!
Basic Steps
Steps to create a basic border in Google Docs
To create a border in Google Docs, one must follow a few basic steps which can be easily accomplished using a few tools in the Google Docs interface. The first step is to create a new drawing in Google Docs which will be used to create the border around your document.
Selecting the shape and adjusting the border to fit your needs
After creating a new document, click the Insert tab and hover over the Drawing option, and then select the rectangle shape. Draw a rectangle and adjust the border to your desired specifications. Next, click on “Save and Close” to apply your changes and set the border image to appear behind the text. Finally, you can adjust the size of the border image to fit the document structure.
To summarize, creating a border in Google Docs is a simple task that can be achieved by selecting a suitable shape and then drawing a rectangle, and finally setting the border image to appear behind the text.
Customization Options
Creating a border on your Google Docs document is a simple task that can add a touch of professionalism and organization. However, customization of the border can give your document an extra aesthetic appeal that suits your style. In this section, we will discuss the different customization options available to add to your Google Docs border.
Customizing the border using the Format tab
If you want more control over the border design, you can utilize the Format tab. Here are the steps to customize your Google Docs border using the format tab:
-
Click on the “Format” tab from the Google Docs menu bar
-
Hover over the “Table” option with your cursor and select “Table Properties.”
-
The “Table properties” box should appear on your screen. Change the cell color and thickness to alter how your document border looks like
-
After you finish customizing, click the “OK” button to apply the settings.
Changing the color and line weight of the border
To change the color and line weight of the border, here are the steps to follow:
-
Locate the border icon options on the toolbar. The icons are for customizing the image borders.
-
Click on the pencil icon located beside the border you want to adjust
-
The settings window will appear, providing options for adjusting the line weight, color, and style of your border
By adjusting the line weight, color, and style options, you can create a unique and customizable border that fits perfectly with the look and feel of your document.
Therefore, customizing your Google Docs border is an excellent way to add a touch of professionalism and uniqueness to your document. By utilizing the Format tab and adjusting line weight, color, and style options, you can create a personalized border that suits your needs.
Adding Images
Google Docs has a variety of tools available to enhance the visual appeal of your documents, including adding images to create unique borders. Images can be uploaded to the document and resized as desired for an added visual effect. Here are the basic steps to add images to your document and create a border.
Using images to create unique borders
To add a unique border to your Google Docs document, select an image that represents the border you want to create. This can be done using the Insert option in the top menu followed by selecting Drawing and then + New. Insert the image of the border that you want to use in the Drawing window. Next, select the image you just inserted and click on the blue “Select” button to add it to your document.
Uploading images and adjusting the size and opacity
Another option to add images and borders to your Google Docs document is to upload an image and adjust the size and opacity. To upload an image, click on the “Insert” tab in the top menu and hover over “Image.” From there, you can either select an image from your computer, Google Drive, or by providing a URL. Once the image is inserted, you can adjust its size and opacity by clicking on the image and using the resizing handles or the image toolbar.
Therefore, adding images to your Google Docs document is a simple way to enhance its visual appeal. Whether it’s to add unique borders or to complement the text, images can make your document stand out. By following these basic steps, you can easily add and adjust images to create the perfect document for any occasion.
Adding Images
Google Docs provides multiple ways to add images to your documents, and one of the most popular ways is to create borders using images. This section will walk you through the process of adding images to your documents and using them to create unique and visually appealing borders.
Placing borders around specific elements
Borders around specific elements such as paragraphs, images, and tables can be created in Google Docs using the “Borders and shading” option. You can format the border by clicking on “Format” in the menu bar, selecting “Paragraph styles,” and then clicking on “Borders and shading.” Under the “Position” section, ensure that the border is present on the top, bottom, right, and left.
Borders around paragraphs, images, and tables
You can emphasize text within your document by placing a border around a paragraph. Place your cursor at the beginning of the paragraph and click on “Format” in the menu bar, select “Paragraph styles,” and then click on “Borders and shading.” Select the style you want and click “Apply.” You can also place a border around an image or a table by clicking on it and following the same steps.
Border Placement
Borders can either be placed around individual elements or entire pages. To place borders around an entire page, you can use a table and extend it down the page to simulate a page-long border. Customize the border by clicking on the “Format” tab, hovering over “Table,” and selecting “Table Properties.” Here, you can alter the cell thickness and color and increase padding to add space between the border and your content.
Using images to create unique borders
If you want to create a unique border, you can use images. First, select an image that represents the border you want to create. You can use the Insert option in the top menu and then select Drawing and then + New. Once the drawing window appears, insert the image that you want to use to create the border. Select the image you just inserted and click on the blue “Select” button to add it to your document.
Uploading images and adjusting the size and opacity
Another way to add images to your document is to upload them and adjust their size and opacity. To upload an image, click “Insert” in the top menu, hover over “Image,” and select either an image from your computer, Google Drive, or provide a URL. Once the image is inserted, adjust its size and opacity by clicking on the image and using the resizing handles or the image toolbar.
Therefore, using borders in your Google Docs document can enhance its visual appeal and help emphasize specific sections. You can use various methods to create borders, including using images, tables, and the “Borders and shading” option. By following these simple steps, creating visually appealing documents in Google Docs has never been easier.
Applying Borders to Pages
Google Docs provides a range of formatting options to help users customize their documents, such as adding borders to pages. Borders can be used to frame entire pages or applied to the header or footer of a document. Let’s explore a few ways to apply borders in Google Docs.
Using borders to frame entire pages
To add borders to an entire page, you can follow the same steps mentioned above for adding borders around a specific section. Firstly, click on “Insert” in the top menu, then hover over “Drawing” and select “+New.” Within the drawing canvas, select the rectangle shape and draw a rectangle around the entire page. Adjust the size of the rectangle as desired and set the text wrap to “behind text.” Finally, click “Save and Close” to apply the border to the page.
Adding borders to the header or footer
To apply a border to the header or footer of a Google Docs document, navigate to “Insert” and select either “Header” or “Footer” from the list. Once you have added a header or footer to your document, you can add a border to the section by clicking on “Insert” and selecting “Drawing.” Within the drawing canvas, draw a rectangle that fits within the header or footer section and adjust the size of the rectangle as desired. Finally, set the text wrap to “behind text” and click “Save and Close” to apply the border.
Therefore, adding borders to Google Docs documents is easy with the various tools available within the platform. Whether you want to frame an entire page or add a border to the header or footer, using shapes and drawings can help you create a more visually appealing document. Try experimenting with different border styles and shapes to give your document a unique look and feel.
Keyboard Shortcuts
Google Sheets provides a range of features to help users create and format their spreadsheets, including the ability to add borders. While there are several ways to add borders in Google Sheets, using keyboard shortcuts can help save time and improve productivity. Let’s explore some time-saving shortcuts for border creation and common border tasks.
Time-saving shortcuts for border creation
One of the quickest ways to add a border in Google Sheets is by using keyboard shortcuts. Here are a few shortcuts for applying different types of borders at lightning speed:
-
Apply bottom border: Alt + Shift + 3
-
Apply left border: Alt + Shift + 4
-
Apply outer border: Alt + Shift + 7/ Ctrl + Shift + 7
Keyboard shortcuts for common border tasks
Apart from the above shortcuts, there are several other keyboard shortcuts that can be used to perform common border-related tasks in Google Sheets. Here are a few shortcuts to add to your arsenal:
-
Remove borders: Alt + Shift + 6
-
Insert link: Ctrl + k
-
Insert time: Ctrl + Shift + ;
In addition to these shortcuts, you can also customize keyboard shortcuts in Google Sheets by clicking “Tools” > “Preferences.” From there, you can select the “Keyboard shortcuts” tab and customize shortcuts as per your preferences. These shortcuts can help improve your productivity and make working with Google Sheets easier, especially if you use it frequently.
Therefore, using Google Sheets’ range of formatting options is easy and can help you create visually appealing spreadsheets. By using keyboard shortcuts, you can save time and improve productivity when adding borders, making Google Sheets a useful tool for a range of tasks. Make sure to explore all the features of Google Sheets to customize your spreadsheets as per your preferences and achieve your desired outcome.
Troubleshooting
Common issues when creating borders and how to solve them
Adding borders to a Google Docs document can be a simple process, but like any formatting task, it can cause issues. Here are a few common issues users may encounter when creating borders and how to solve them.
Issues with alignment, spacing, and overlapping borders
One of the most common issues with borders is getting them to align correctly. If you have trouble getting your border to line up with the page or section you want to frame, try adjusting the margins. To reduce the size of the margins, go to the “File” tab, click “Page Setup,” and adjust the spacing settings. Additionally, make sure your border is set to “behind text” so that your text doesn’t overlap with the border.
Another issue users may encounter is overlapping borders. If you have multiple borders on one page, they may not align properly, causing them to overlap and create an unsightly layout. To mitigate this issue, try adjusting the size and position of each border until they align flawlessly. You can also use the “Arrange” tool to send certain shapes to the front or back of the document, preventing them from overlapping.
Finally, keep in mind that different computers and web browsers can display documents differently. So, even if your document looks great on your computer, it may look different on someone else’s. To avoid this, make sure you choose a border design that works well with a variety of devices and browsers. When in doubt, go for a simple, classic border, like a plain black line or rectangle.
Overall, adding borders to your Google Docs documents can be an effective way to add professionalism and visual appeal to your work. By addressing common issues and using the tools and techniques available in the platform, you can create elegant designs that enhance your content.
Troubleshooting
Common issues when creating borders and how to solve them
When adding borders to a Google Docs document, users may encounter a few issues along the way. Here are some common issues and how to solve them.
Issues with alignment, spacing, and overlapping borders
One of the most common issues with borders is getting them to align correctly. This can be resolved by adjusting the margins. To do so, go to the “File” tab, click “Page Setup,” and adjust the spacing settings. Additionally, ensure that the border is set to “behind text” to prevent the text from overlapping with the border.
Another issue is overlapping borders. If there are multiple borders on one page, they may not align properly, causing them to overlap and create an unsightly layout. To mitigate this issue, adjust the size and position of each border until they align flawlessly. Use the “Arrange” tool to send certain shapes to the front or back of the document, preventing them from overlapping.
It’s worth noting that different devices and web browsers can display documents differently. To ensure the border looks consistent across devices, select a border design that works well with a variety of devices and browsers. When in doubt, go for a simple, classic border, like a plain black line or rectangle.
Summary of border creation in Google Docs
Adding a border in Google Docs can be accomplished in several ways. You can draw a border, use the table formatting, paragraph styles or even add borders to images. To draw a border, create a new drawing in the Google Doc, select the rectangle shape, and draw a rectangle around the area you want to frame.
Final tips and tricks for using borders effectively
Adding a border can enhance the visual appeal of a document. However, it’s essential not to overdo it. Ensure that the border complements the content rather than distracts from it. Stick to a simple border design and avoid using borders for every section to avoid cluttered look for your document. Also, remember when a user prints a Google Doc with a border or views it on a mobile screen, the border may shrink or be lost altogether, keep this in mind for the presentation of your content.


