Talking about Luminar 4 puts us in front of a great dilemma, because up until now photographic post-production was a professional job because it required years of practice and study.
Today it is mostly still like this, but it is clear that the road towards the democratization of this work inevitably passes through the service of an increasingly powerful artificial intelligence and if on the one hand more and more users are able to operate professionally, on the other who is and of the profession can find drastically shorter work times, a considerable advantage if used in a way, pass the term, intelligent.
Luminar 4 takes a huge step in this direction and this can benefit both beginners and those who want to speed up an increasingly pressing workflow.
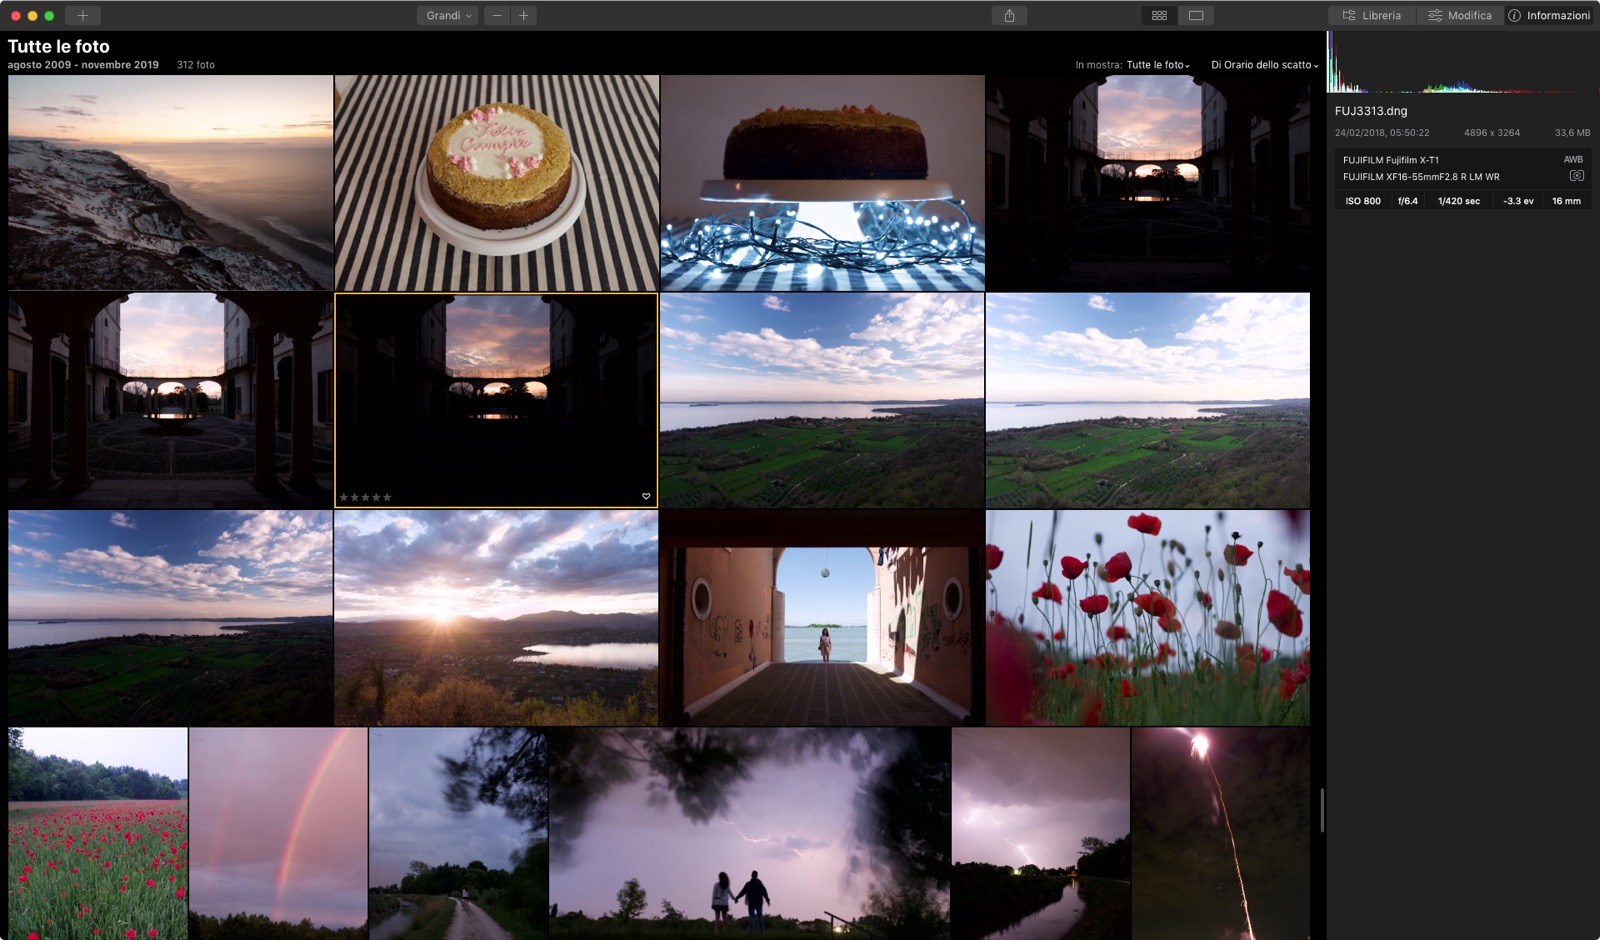 The Luminar 4 database interface
Luminar 4, the review
Like Lightroom, simpler than Lightroom
The first thing you notice in Luminar 4 is the kinship with Adobe Lightroom, currently the reference name in the photographic sector: a kinship that in any case does not hurt, because it optimizes rules, practices and a now standard and better known teaching method.
We call it kinship because in many ways it offers completely different directions: Luminar bases its intimate nature on simplicity, and in fact many things are more immediate, even if on balance the App is not yet as a user would like it, given that there is still room for improvement.
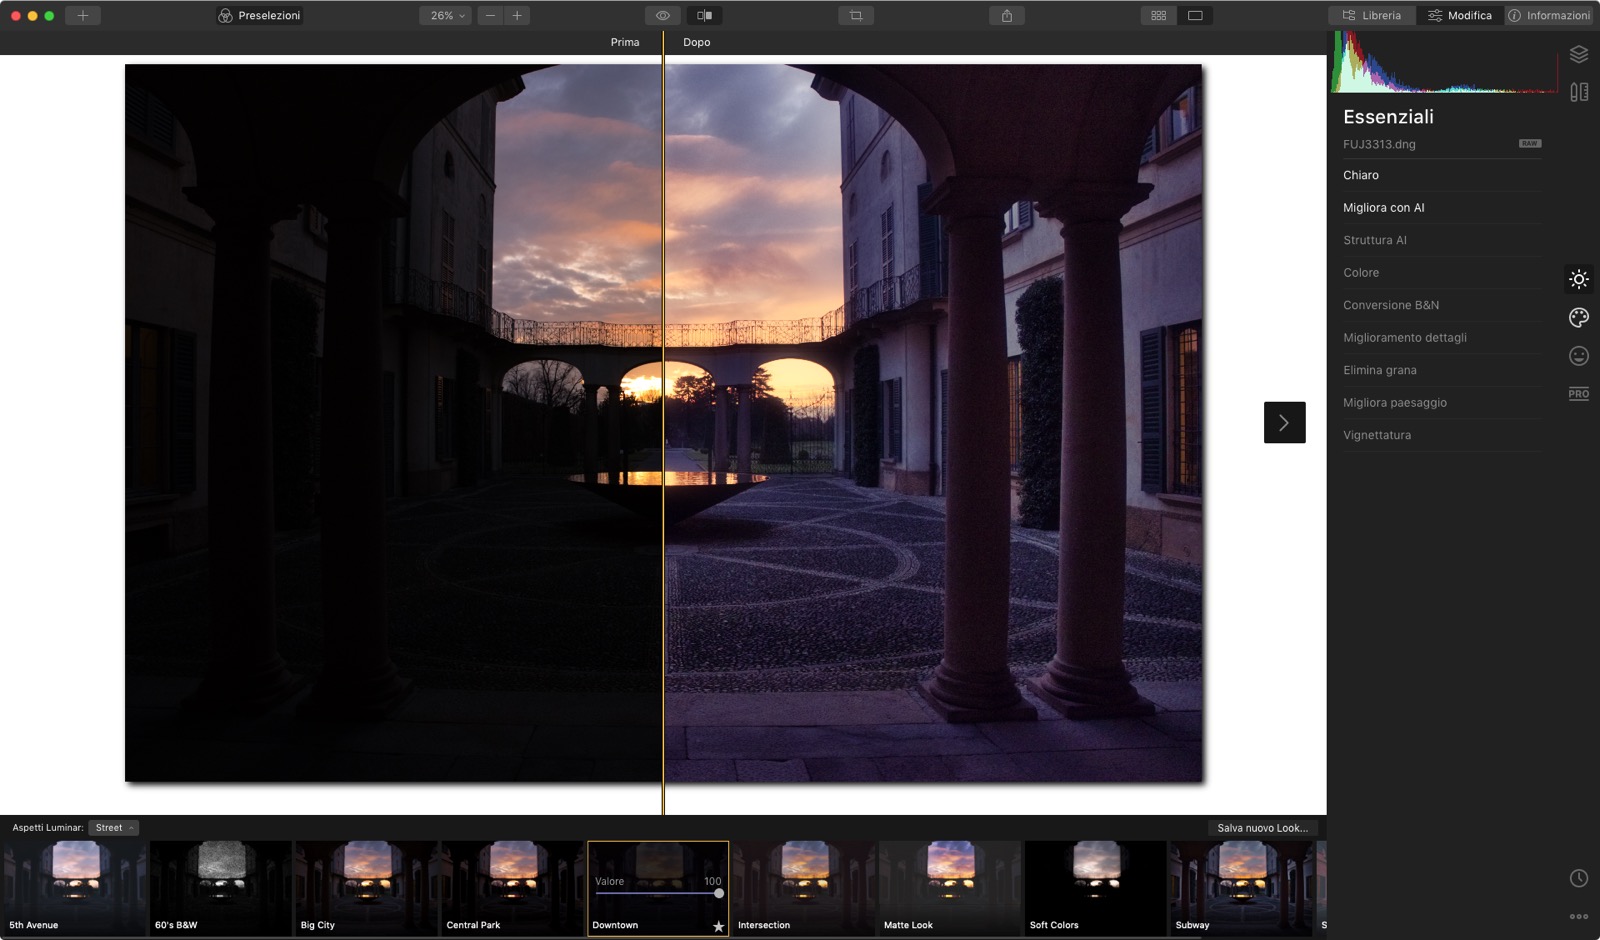 A simple one-click effect (here in the before and after), using one of the Aspects of Luminar 4
For example, the creation of a catalog on Luminar is implicit, in the sense that if we feed it a folder of images (rasterized as jpeg, Tiff or Png or RAW it doesn't matter) the App creates the catalog on the fly, without redundant questions. (and without asking where to save him, he does everything).
The approach is clearly consumer and pleasant, because the user is taken by the hand and guided without fear through an always treacherous terrain.
Those who have been chewing bread and Raw for years will find this practice a bit confusing, especially for the feeling of not having full control of the flow: the database can be exported with a backup, however keeping the local changes for a single RAW seems like an operation. not feasible and this is a big flaw, especially for professional realities where interchange is quite common.
Missing, but it was known, the part of creating the albums, which perhaps will arrive in the future, but which at the moment has to make do with some third-party App or online services.
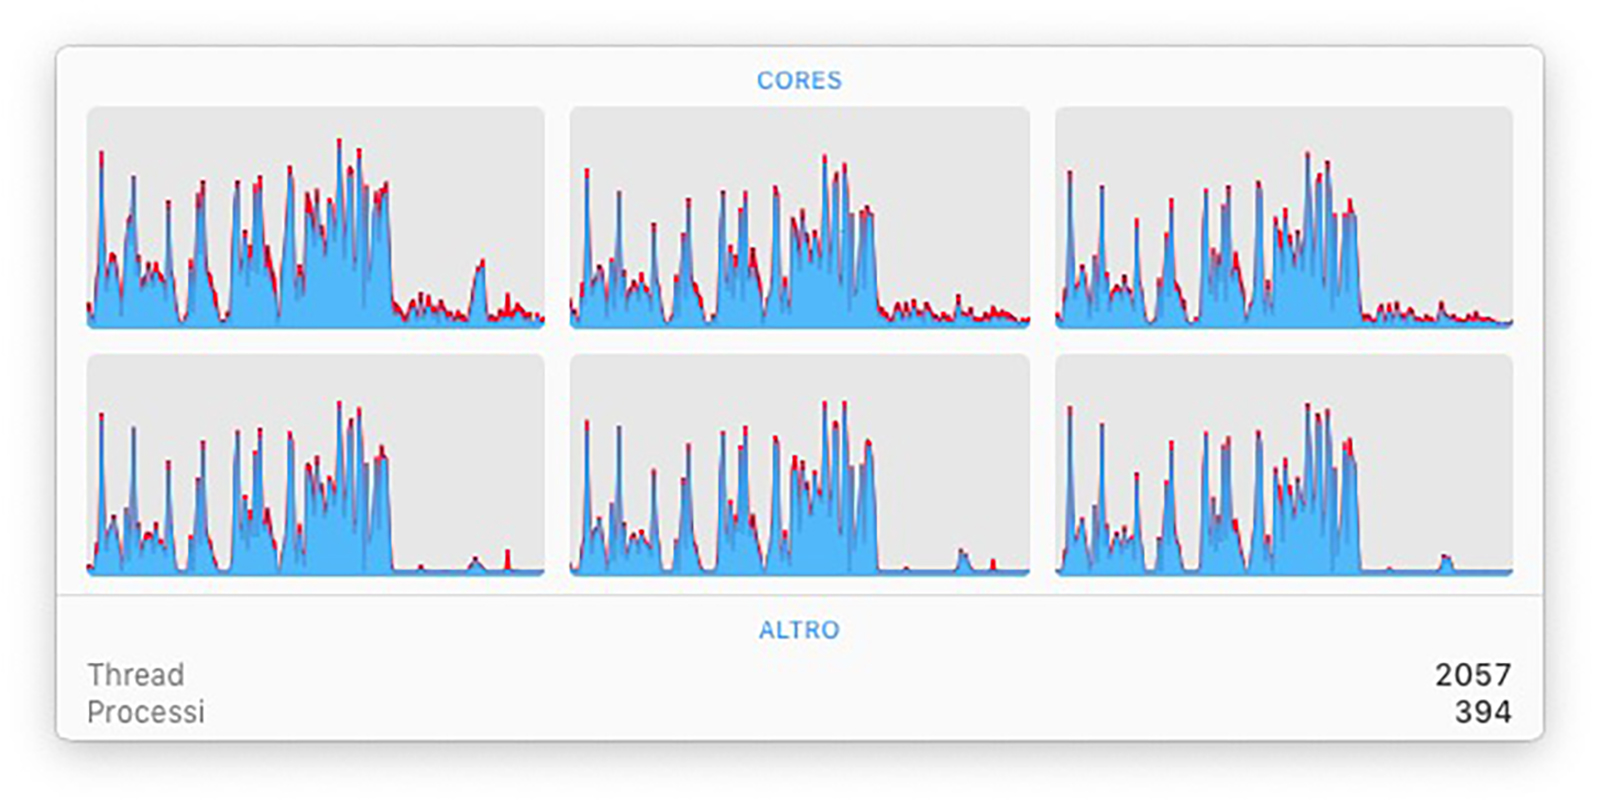 The management phase of an Intel i7 processor by Luminar: first in the retouching of some raw shots, then in the simple database management
Editing
The interface has been revised and simplified: everything is controlled by the three menus at the top right: Library (for managing the shots), Edit (for post production) and Information (for shooting details).
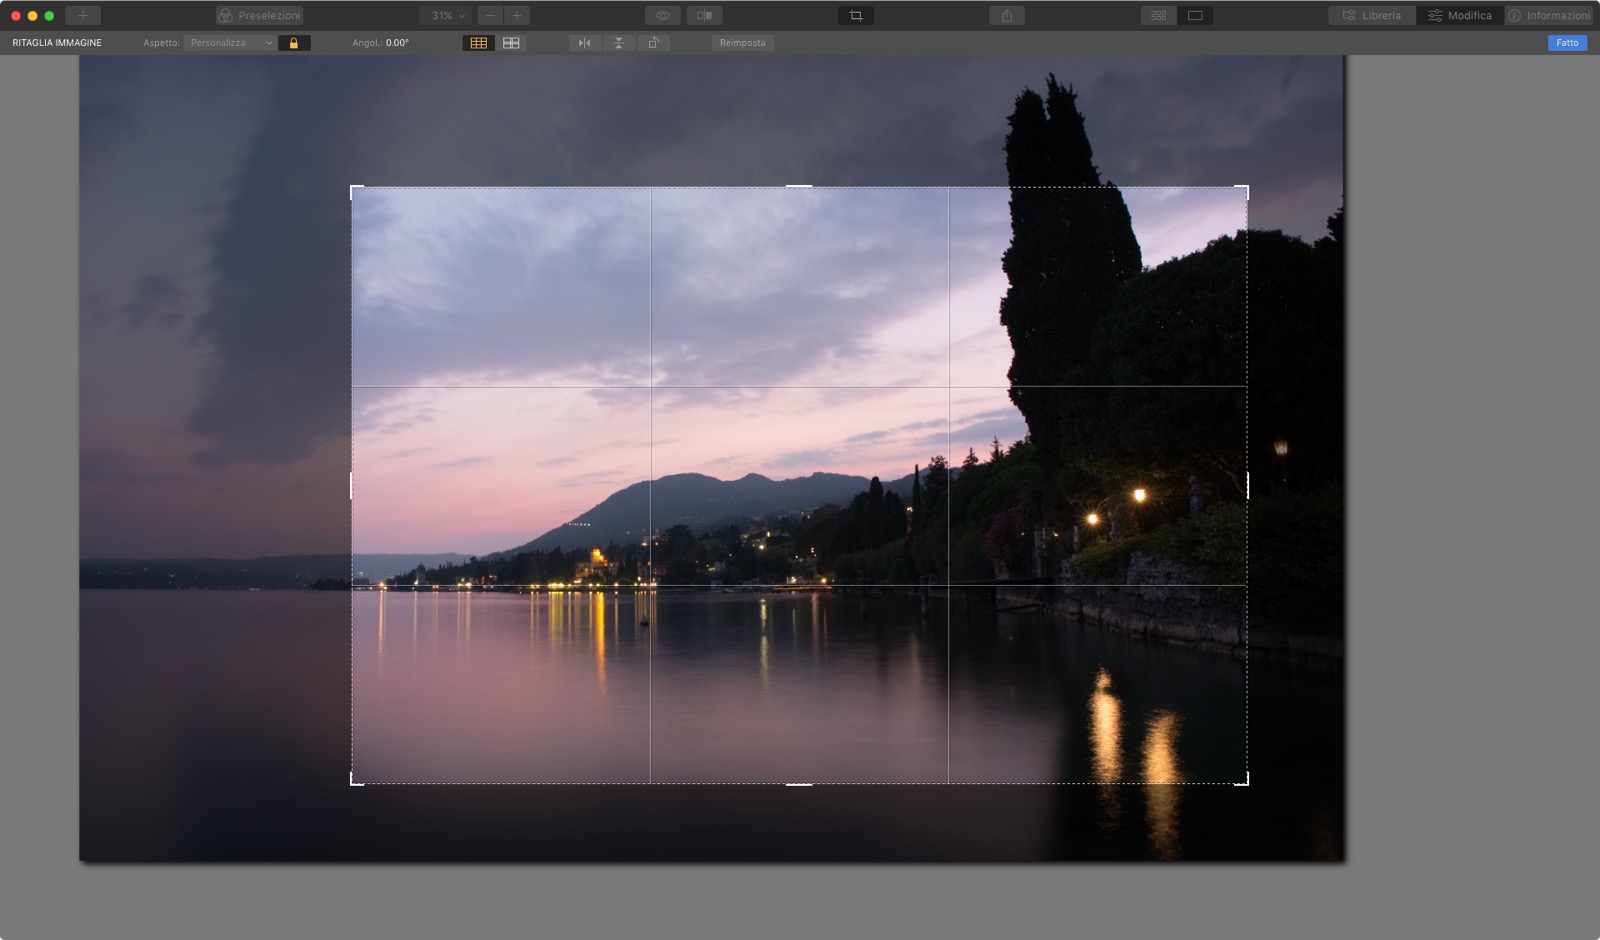
The juiciest part is the one dedicated to Editing, where we find the commands grouped into six submenus: Levels (for the management of multiple overlapping shots), Canvas (which controls the geometry of the shot), Essentials (for the retouching of light and color more common), Creative (for the use of artificial intelligence and more creative commands), Portrait (specifically designed for faces) and finally Professional, where more vertical controls are placed, which is better left alone if not we know what we are talking about).
Appearances, which are collections of predefined sets, divided into groups, which can be applied individually and can be modified using an opacity slider, peep out from these commands.
Appearances are a formidable weapon for those who are not experts, because thanks to them, obtaining a particular effect is a matter of a single click: in the basic installation there are seven groups of Aspects, plus a personal one defined by the user, but others they can be purchased from the parent company's website.
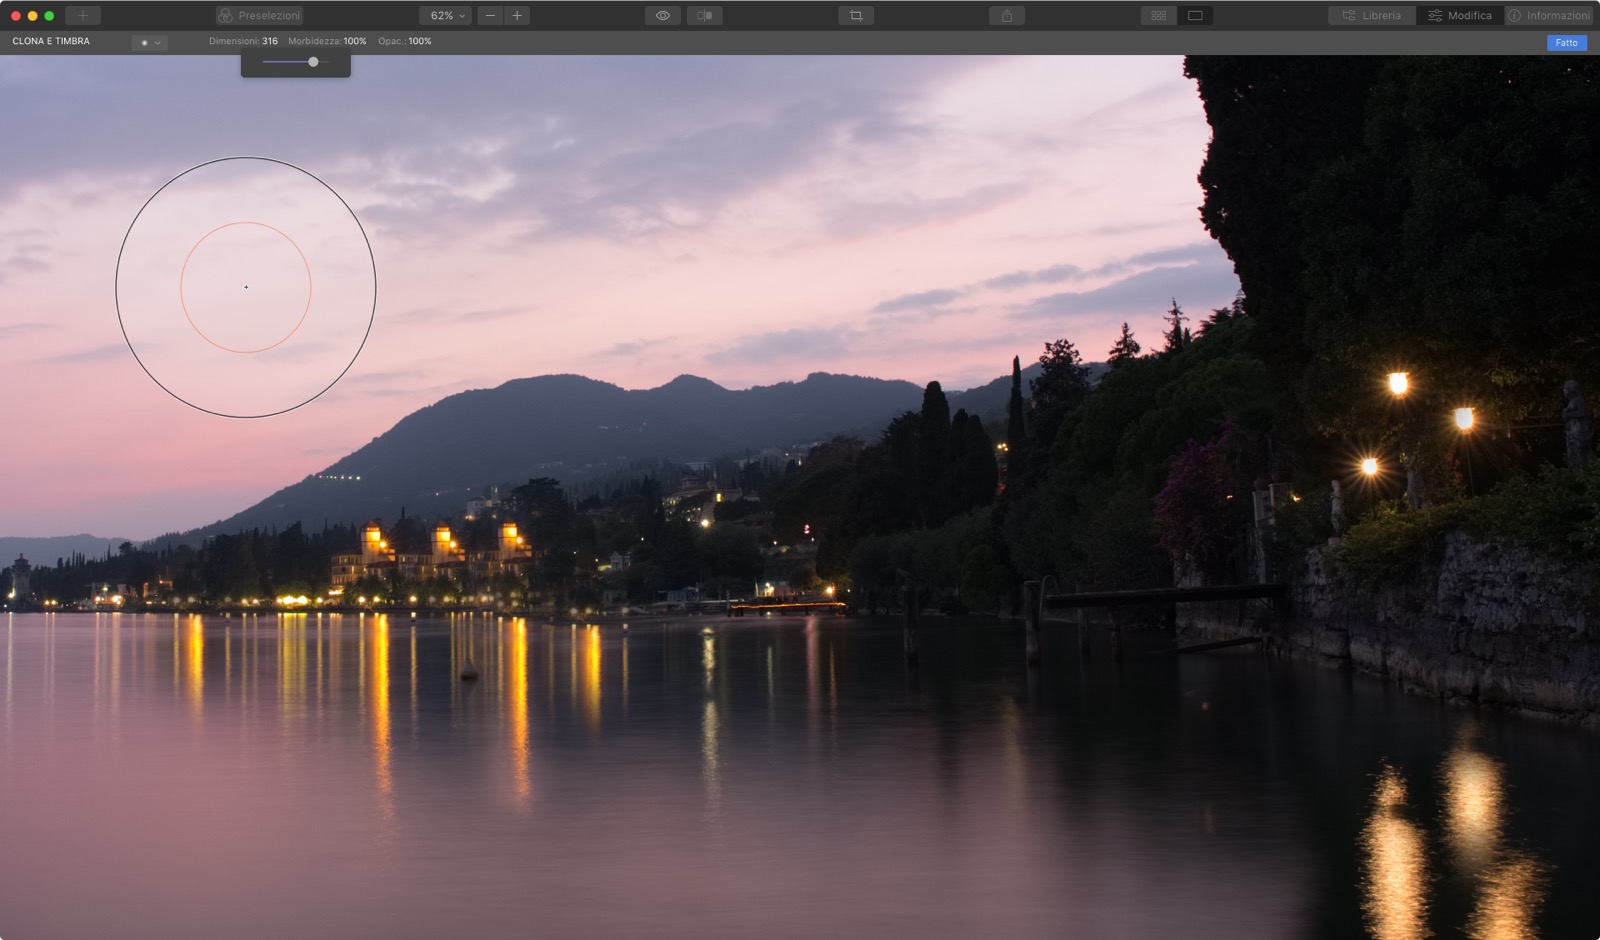 The cloning tool is also very nice: in the image, we multiplied the church in the center by three
I three musketeers
The novelties of this version are many, but the most important ones are given by three main tools, which make use of artificial intelligence to compensate for the user's abilities or to speed up their work.
The first we analyze is AI Structure : basically it is what in Photoshop ( Camera RAW) we know as Clarity, here managed in a non-linear way but through, in fact, the artificial intelligence that analyzes the image and operates differently in the various areas, according to need.
Like every command in Luminar 4, AI Structure can also be managed through a mask, manual with brush, in gradient or brightness.
The examples we see in these pages are RAW images by Michele Discardi, taken with a Fujifilm X-T1 equipped with XF 16–55mm ƒ2.8 lens, used here in RAW format sometimes native, sometimes converted to DNG by Adobe DNG Converter without obvious differences.
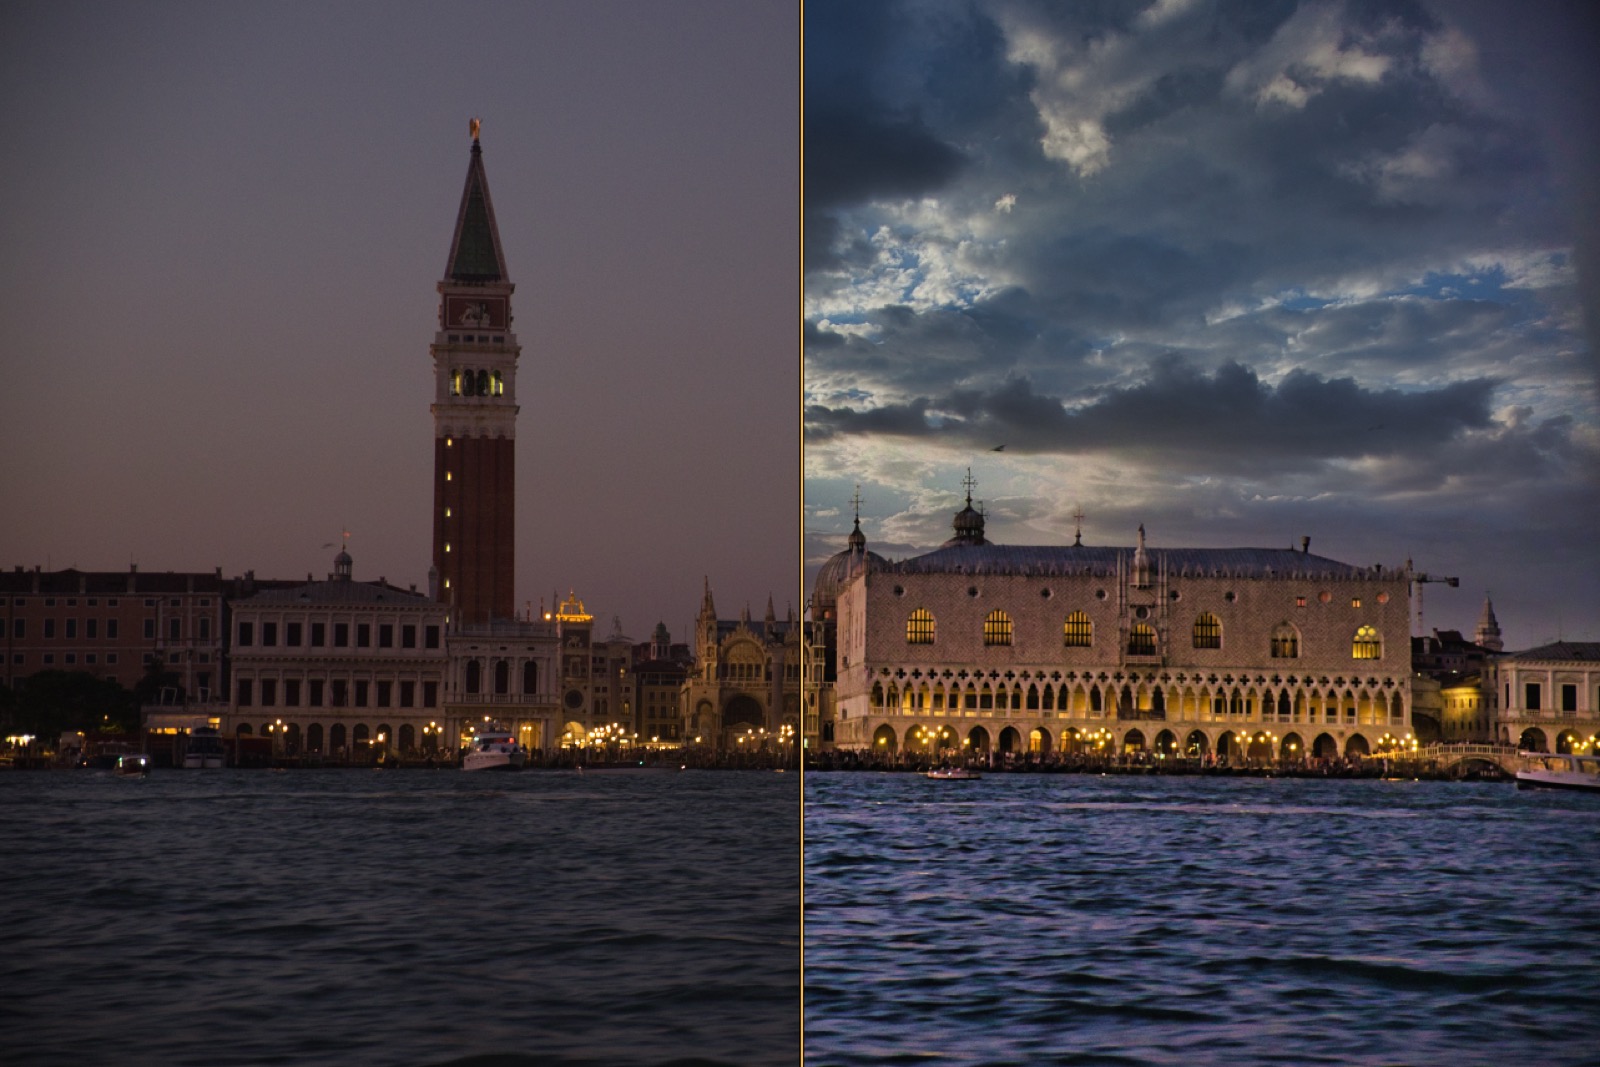
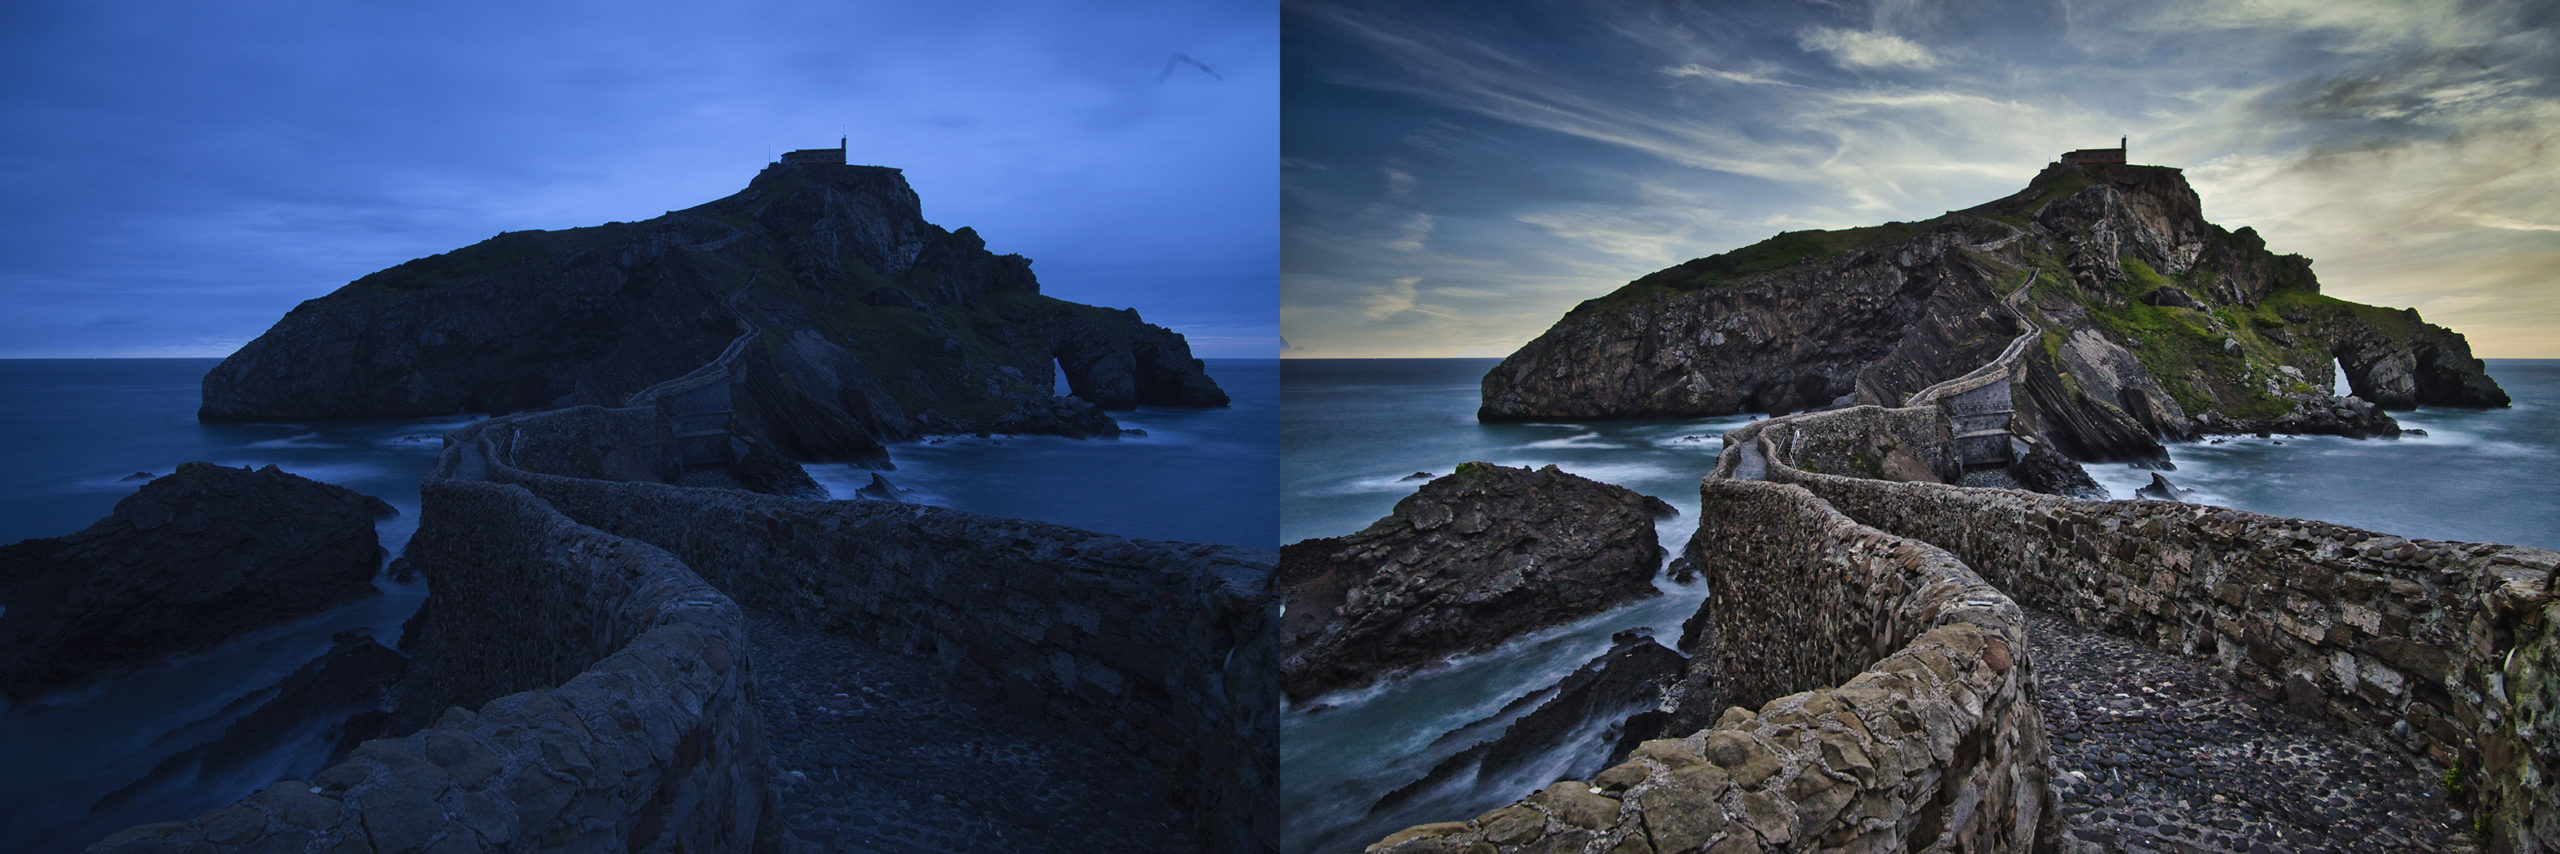 Playing a little with the lights and the Structure tool, to get depth and more details, and then also a new sky
The sky with a finger
However, what in our opinion is the most incredible novelty (among those anticipated by our preview) is the tool AI Sky Replacement : the system analyzes the image and obtains, in a totally automatic way (and it is strange to write it because it is true), the portion of the sky in a photo and is able to replace it with any of the models provided in the App.
All this is achieved with a couple of clicks, even if the advanced options allow you to edit the result in a more personal way.
The process is so beautiful and powerful that it is impossible, at least the first few times, not to play around with it to experiment. The change of the sky is very interesting because it also obtains the result of radically changing the point of view of the photo, which with some other basic retouching can become from cloudy morning to evening with a starry sky.
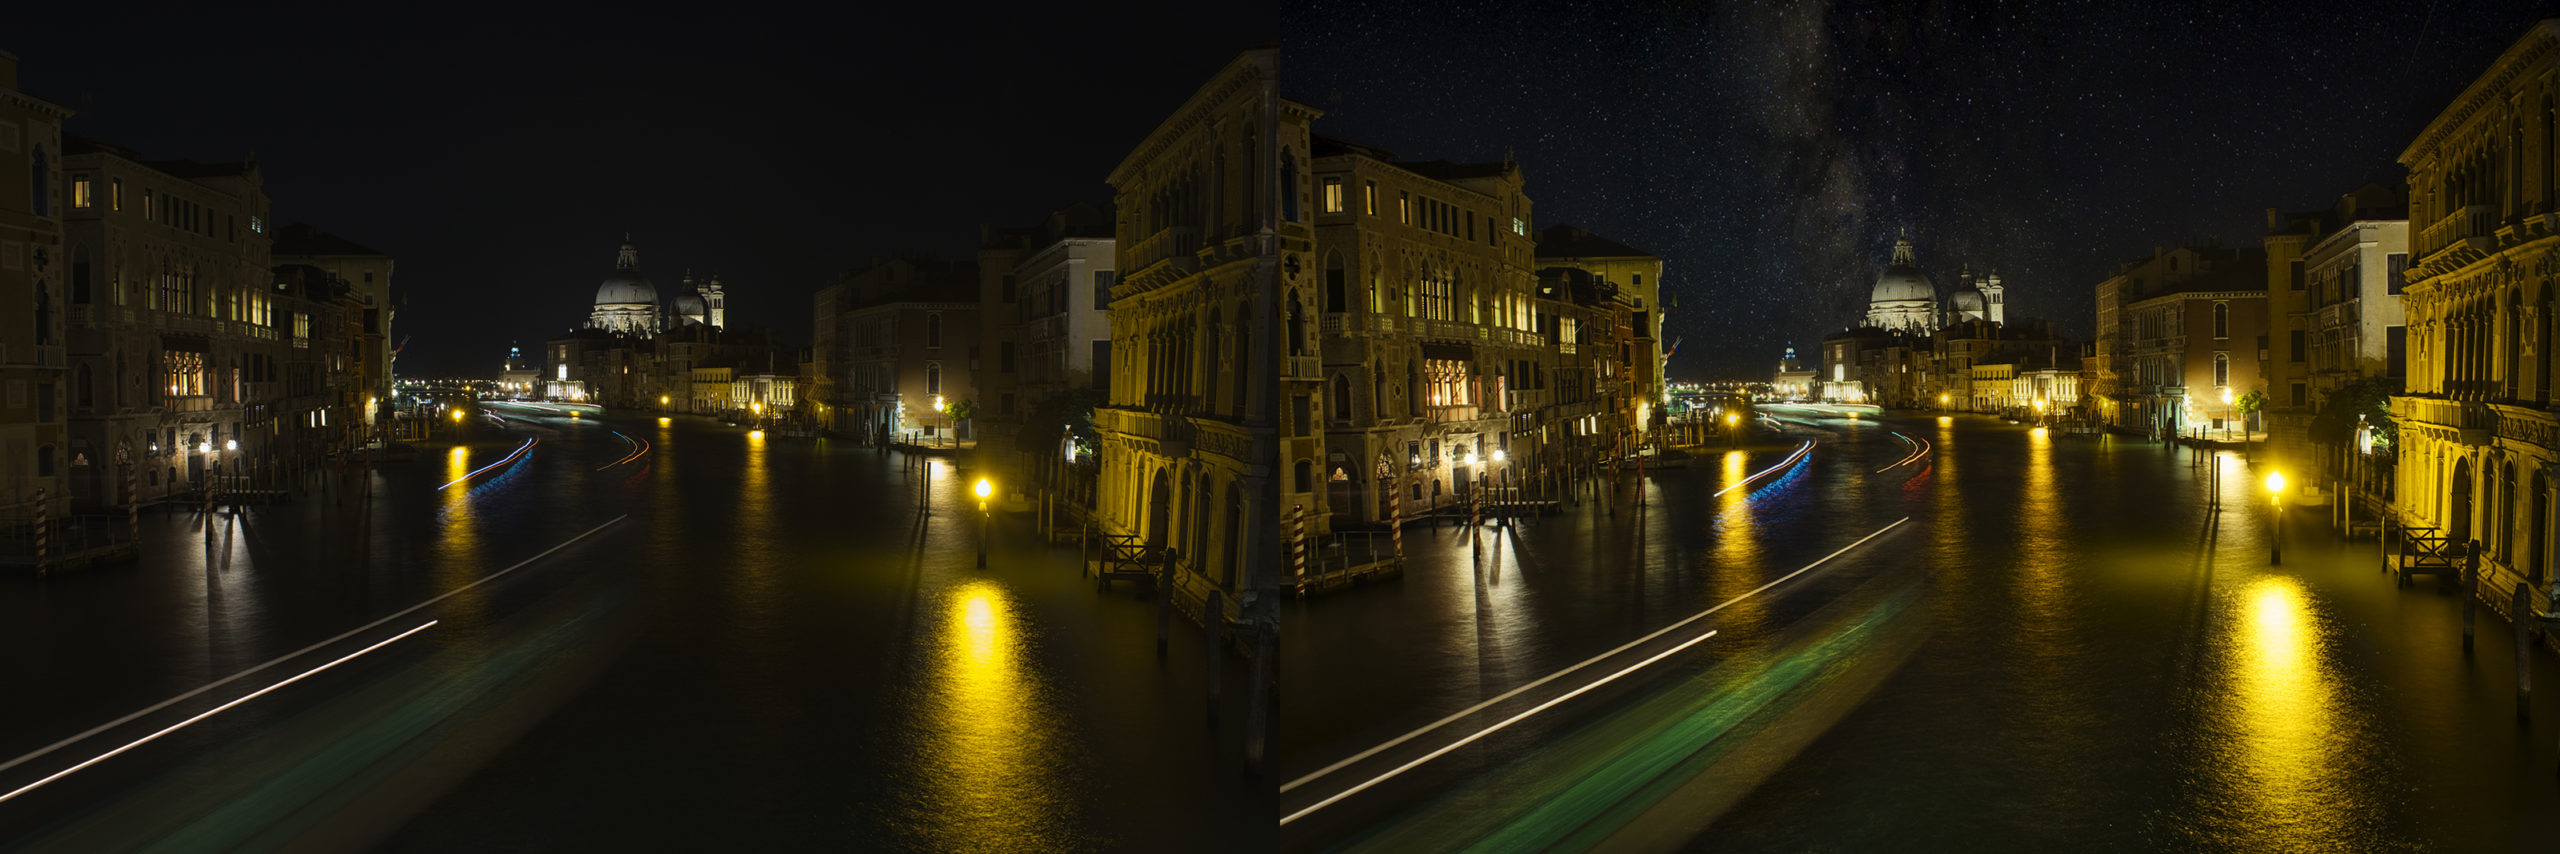 Here we have exaggerated a bit, we know, because you can't see a sky like this in Venice, however we liked the idea of being able to give a personal touch at the click
Friends for your skin
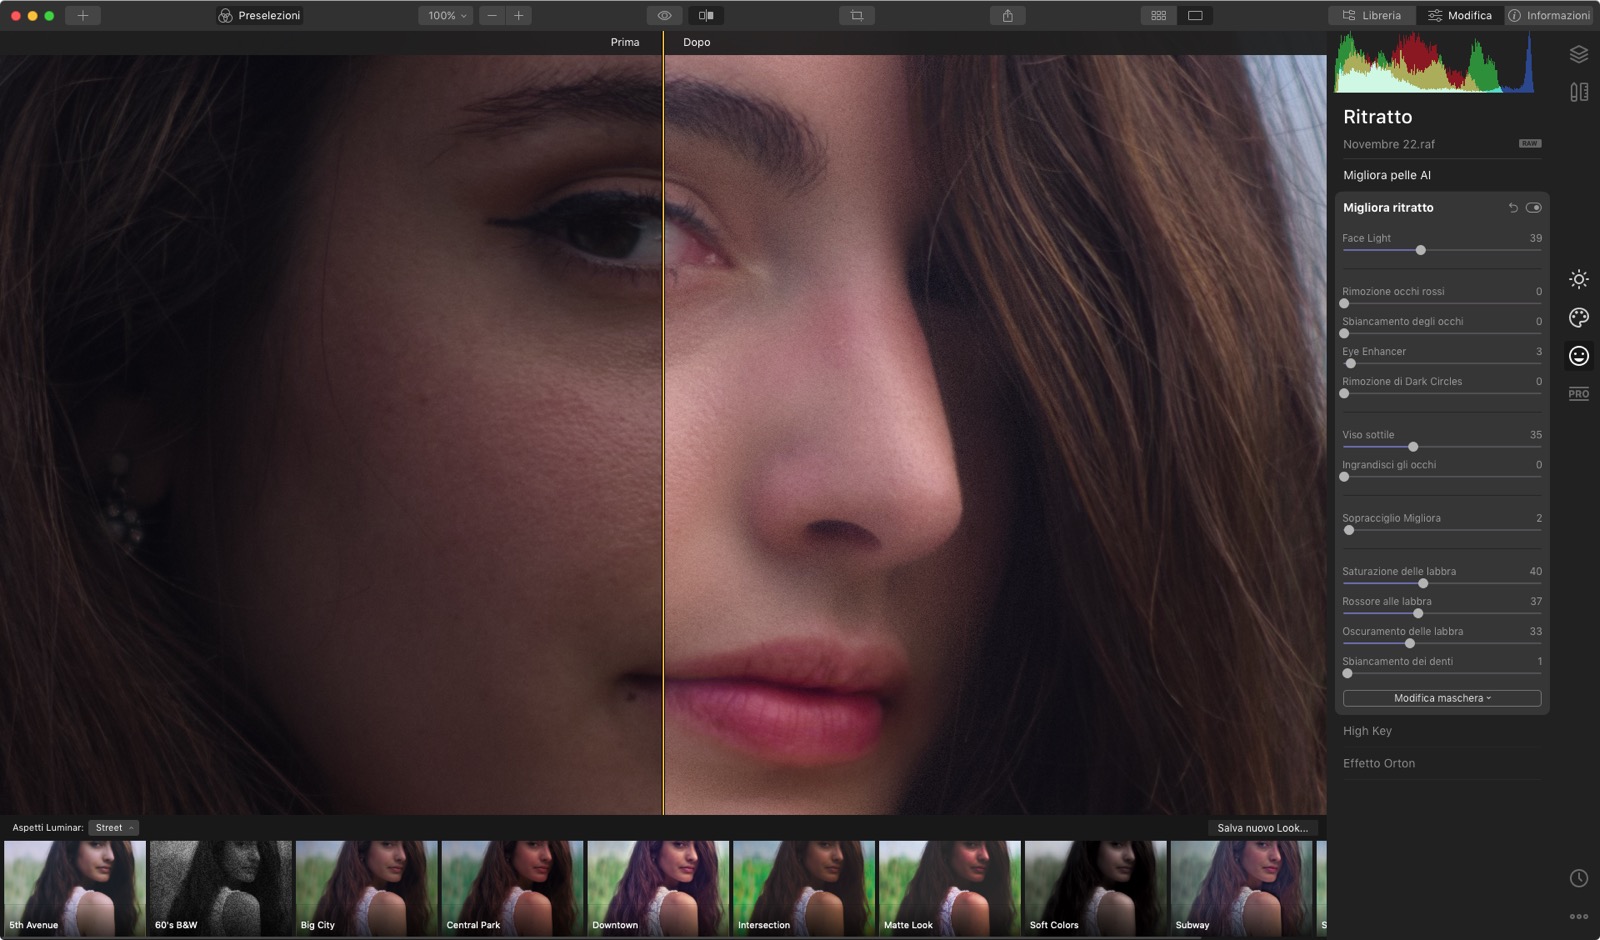
Last, but only in chronological order, is the tool dedicated to portraits: here it is possible to soften the skin (one of the most complex and requested techniques) but also to work on the geometry of the face, independently manage the color of the lips and the brightness of the face. (independently from that of the background).
For those who make portraits a (great) passion or a source of income, this tool alone offers great satisfaction and almost trivial use times.
The only flaw, the fact that the instrument does not always “recognize” the face: when it does not happen, many of the instruments do not work, because they are designed to isolate the elements of a portrait. But you can still adjust it the old way.
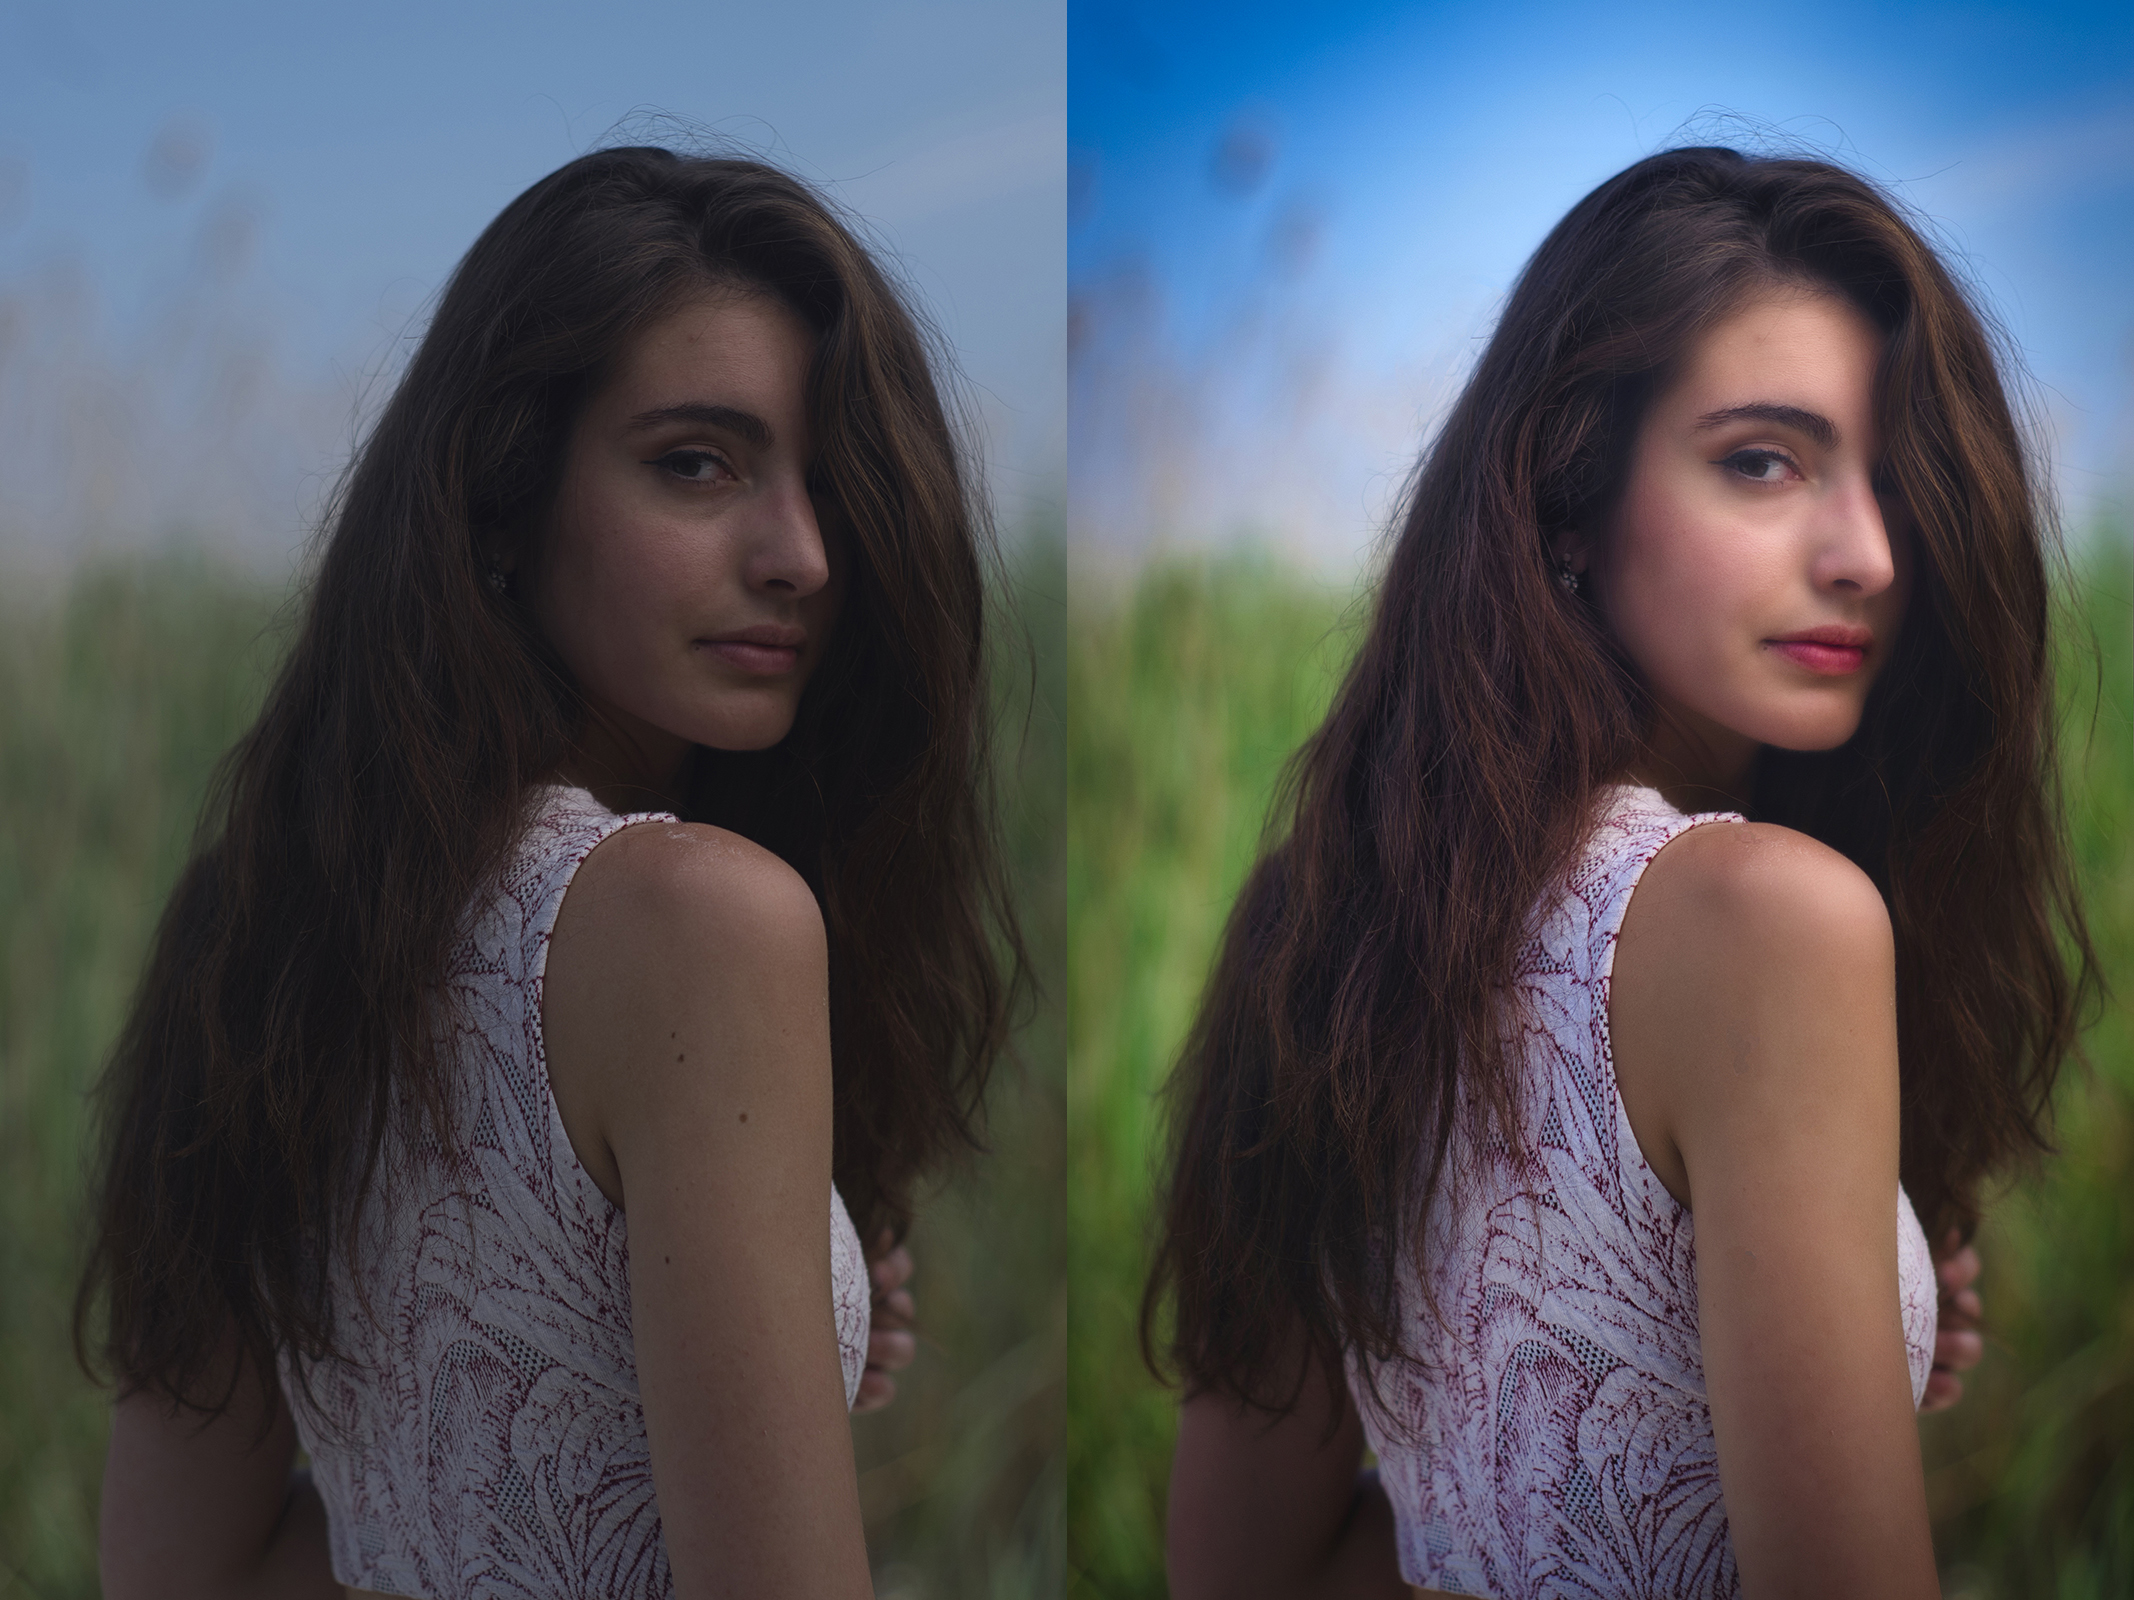 The portrait instrument at work: very good, as long as you recognize the face
An (almost) perfect tool
The improvements in this version are many: all the tools have become more capable and the interface is now in Italian and substantially the use of artificial intelligence in some cases drastically reduces the processing time.
However, according to the humble opinion of the writer, the margins for improvement are still there: we have already talked about the lack of a native file that contains the RAWs and the modifications, and here and there we have unexpected waiting times, both for the workload on a particular shot (no more than a few seconds, a time of which, however, the App does not warn) and for export in batches, still too slow.
The review was done on a 2018 Mac mini with SSD, we recommend using this App on a computer (Mac and Windows) with a solid state boot disk.
There is also a lack of GPS data management, which is increasingly important especially for those who take photographs while traveling.
Considerations
If with Luminar 3 we were strongly undecided between staying with the Lightroom market standard and the new one that advances, with this Luminar 4 release we do not see, in all honesty, reasons not to make the leap.
It is not a perfect App, but it is damn powerful, versatile and capable like no other App we know of, it offers a particular but very efficient working system and with some capabilities that border on magic.
There are no albums, there is no advanced management of native files (perhaps via xml) and there is a need to improve the speed but, mind you, the number of defects is less than the competition and when you have tried (thanks to the free 30-day trial) the instrument of the sky and that of the skin you will hardly be able to go back.
Because, let's be clear, this is an App that costs 79.00 Euro one-time, an absolutely affordable price even if you think of using the App as an aid for well-known software.
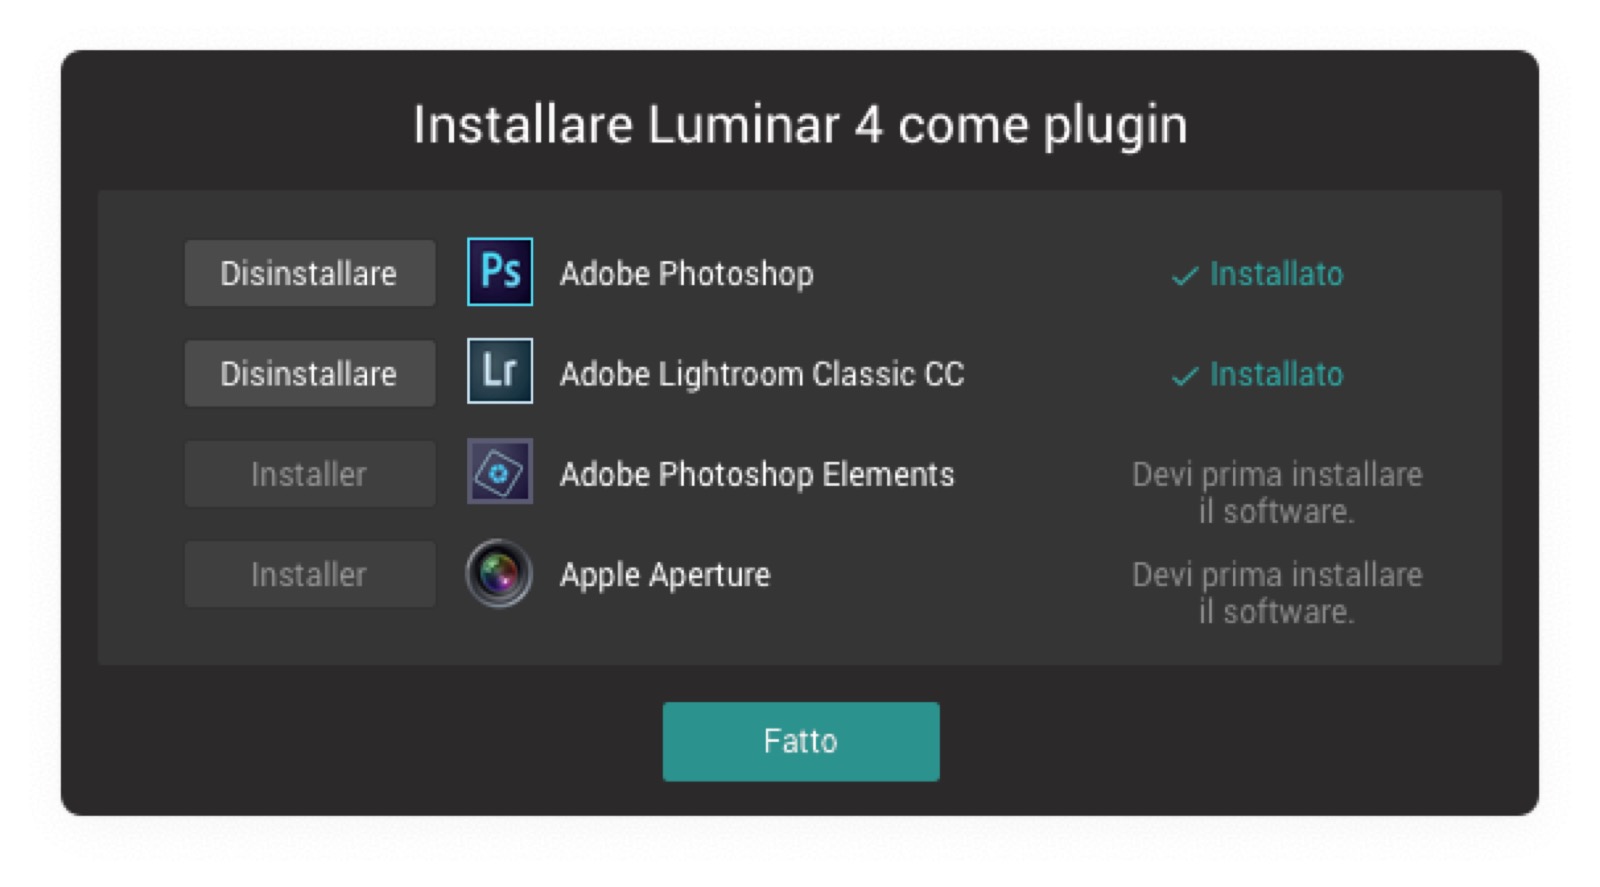 Like the previous versions, Luminar 4 works alone or as a plug-in that can be recalled by the other programs present
Pros:
• Improved interface and in Italian • Exceptional use of AI • Incredible price-performance ratio
Cons:
• A modern interchange format is missing • We would have liked a GPS module
Price:
• 79.00 Euro
Luminar 4 is already available for Mac and Windows in Italian at the price of 79.00 Euros as a one-time purchase from the website.
For those interested, Aurora HDR 2019 is also available, by the same developers, designed for those who love high dynamic range imaging techniques.


